
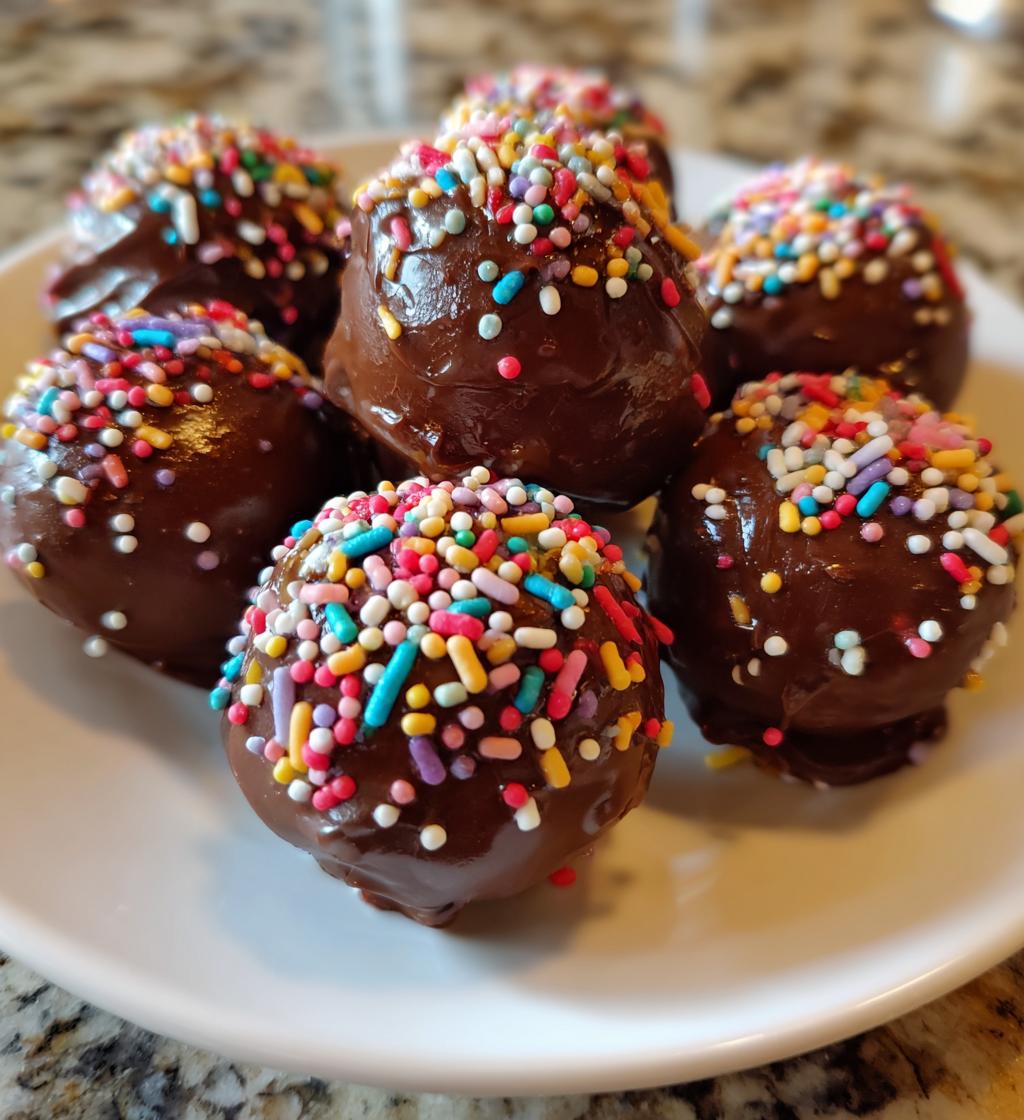
Oh my goodness, let me tell you about these *valentines day cake pops*! They’re the cutest little treats you’ll ever make, and I just adore whipping them up for my loved ones. There’s something so special about gifting a bite-sized piece of sweetness, especially when it’s shaped like a pop of love! I remember the first time I made these for a Valentine’s Day party. My kids helped me decorate them with sprinkles, and we ended up with a rainbow of colors that made everyone smile. It was such a fun bonding experience, and I swear, seeing their faces light up as they took a bite was the best part. The beauty of these cake pops is how easy and fun they are to create at home. You don’t need to be a professional baker – just a bit of enthusiasm and creativity! Trust me, once you try these, you’ll want to make them for every celebration!
Oh my goodness, let me tell you about these valentines day cake pops! They’re the cutest little treats you’ll ever make, and I just adore whipping them up for my loved ones. There’s something so special about gifting a bite-sized piece of sweetness, especially when it’s shaped like a pop of love! I remember the first time I made these for a Valentine’s Day party. My kids helped me decorate them with sprinkles, and we ended up with a rainbow of colors that made everyone smile. It was such a fun bonding experience, and I swear, seeing their faces light up as they took a bite was the best part. The beauty of these cake pops is how easy and fun they are to create at home. You don’t need to be a professional baker – just a bit of enthusiasm and creativity! Trust me, once you try these, you’ll want to make them for every celebration!
Ingredients List
To create the most delightful valentines day cake pops, you’ll need the following ingredients:
- 1 box of chocolate cake mix
- 3 large eggs
- 1 cup of water
- 1/2 cup of vegetable oil
- 1 cup of frosting (any flavor you love)
- 12 oz of chocolate coating (you can choose milk, dark, or white chocolate)
- Sprinkles for decoration (the more colorful, the better!)
Feel free to get creative with your frosting and toppings! It’s all about making these pops your own!
How to Prepare Valentines Day Cake Pops
Step 1: Preheat the Oven
First things first, let’s get that oven ready! Preheat it to 350°F (175°C). Preheating is super important because it ensures that your cake bakes evenly and rises beautifully, giving you the perfect base for those adorable cake pops!
Step 2: Prepare the Cake Mix
Next up, grab your box of chocolate cake mix and follow the package instructions. It’s usually as easy as mixing the cake mix with the eggs, water, and vegetable oil in a large bowl. Make sure to mix it well until there are no lumps. For the best results, I like to use an electric mixer for about 2 minutes. It makes everything so fluffy and light!
Step 3: Bake the Cake
Pour that lovely batter into a greased baking pan and pop it in the oven. Bake for about 30-35 minutes. Now, here’s a little tip: to check if it’s done, insert a toothpick into the center of the cake. If it comes out clean, you’re good to go! If not, give it a few more minutes and check again.
Step 4: Cool the Cake
Once your cake is baked to perfection, let it cool completely. This step is crucial! If you try to crumble the cake while it’s still warm, it’ll turn into a gooey mess. Trust me, I’ve been there! Let it sit at room temperature for about 30 minutes, or until it’s nice and cool to the touch.
Step 5: Make Cake Balls
Now comes the fun part! Crumble the cooled cake into a large bowl. You want to break it up into tiny pieces. Then, add the frosting and mix it all together until it’s well combined. Use your hands if you need to; it’s a great way to feel the texture! Once it’s mixed, roll the mixture into small balls, about 1 inch in diameter, and place them on a baking sheet.
Step 6: Chill the Cake Balls
Time to chill! Pop those cake balls in the refrigerator for at least 1 hour. This step is essential because it helps the balls firm up, making them easier to dip in chocolate later. Plus, it’s a perfect time to clean up your kitchen!
Step 7: Melt Chocolate Coating
While your cake balls are chilling, let’s melt the chocolate coating. You can do this in a microwave-safe bowl. Microwave the chocolate in 30-second intervals, stirring in between until it’s smooth and fully melted. Be careful not to overheat it, or it might seize. If you want to keep it warm while you work, just set it over a pot of hot water!
Step 8: Assemble the Cake Pops
Time to bring it all together! Dip the end of a lollipop stick into the melted chocolate, then gently insert it into a cake ball. This will help hold the stick in place. Next, dip each cake ball into the chocolate coating, letting any excess chocolate drip off. Don’t forget to sprinkle on your decorations before the chocolate sets!
Step 9: Let Set
Finally, place the dipped cake pops upright in a Styrofoam block or a cake pop stand to let them set. This usually takes about 30 minutes. Just make sure they’re not touching each other, so they don’t stick together. Once set, they’re ready to be enjoyed or packaged up as the sweetest Valentine’s Day treats!
Tips for Success
To make sure your valentines day cake pops turn out perfectly every time, here are some tips that I swear by:
- Don’t rush the cooling: Seriously, let that cake cool completely before crumbling it. It makes a world of difference in texture and prevents a gooey mess!
- Use the right frosting: Choose a frosting that complements your cake flavor. Cream cheese frosting adds a lovely tang, while buttercream gives a rich sweetness. Feel free to experiment!
- Perfect ball size: Aim for about 1 inch in diameter for your cake balls. If they’re too big, they can be unwieldy to dip, and if they’re too small, they might not hold up on the stick.
- Chill, chill, chill! Don’t skip the chilling step. It’s essential for keeping the cake balls firm so they don’t fall apart when you dip them.
- Watch the chocolate: When melting your chocolate, keep an eye on it! Stir often and stop microwaving as soon as it’s mostly melted – the residual heat will finish the job without scorching.
- Get creative with toppings: Sprinkles are a classic, but think outside the box! Crushed nuts, coconut flakes, or even edible glitter can add that extra sparkle and flavor!
- Practice makes perfect: Your first batch might not be Instagram-perfect, and that’s totally okay! Just enjoy the process, and each time you make them, you’ll get a little better.
With these tips, you’ll be well on your way to creating delightful cake pops that’ll impress everyone at your Valentine’s Day celebration!
Variations
The beauty of valentines day cake pops is how versatile they can be! You can easily switch things up to create your own unique treats. Let me share some fun variations that I absolutely love:
- Different Cake Flavors: While chocolate is a classic, why not try red velvet for a striking color and flavor? Vanilla cake is also a great blank canvas that allows your frosting and toppings to shine. You can even use lemon cake for a refreshing twist!
- Frosting Fun: Swap out the traditional chocolate frosting for something like cream cheese or strawberry frosting. The flavor combinations are endless, and you can even mix and match cake and frosting flavors for a fun surprise!
- Coating Choices: Instead of the usual chocolate coating, try using white chocolate or even colored candy melts for a vibrant pop! You can also experiment with flavored coatings like peanut butter or caramel for a delicious twist.
- Nutty Additions: Mix in some chopped nuts or crushed cookies into your cake mixture for added texture and flavor. Think crushed Oreos or pecans for a delightful crunch!
- Fun Decorations: Don’t just stop at sprinkles! Get creative with different toppings like edible glitter, crushed candies, or even heart-shaped confetti for a festive touch. You can even drizzle melted chocolate over the set pops for an elegant finish.
- Seasonal Flavors: For different occasions, consider adding seasonal flavors like pumpkin spice for fall or peppermint for the winter holidays. You can adjust your cake mix and frosting to match the season’s vibe!
With these variations, you can create cake pops that reflect your personality and taste. Get ready to impress your friends and family with these delightful treats that are as fun to make as they are to eat!
Nutritional Information
When you indulge in these delightful valentines day cake pops, it’s good to know what you’re treating yourself to! Here’s the estimated nutritional information for one cake pop:
- Calories: 150
- Sugar: 10g
- Sodium: 50mg
- Fat: 6g
- Saturated Fat: 2g
- Unsaturated Fat: 4g
- Trans Fat: 0g
- Carbohydrates: 22g
- Fiber: 1g
- Protein: 2g
- Cholesterol: 30mg
Remember, these numbers are estimates and can vary based on your specific ingredients and portion sizes. But hey, who can resist a little sweetness, especially when it comes wrapped in love for Valentine’s Day? Enjoy every bite—you deserve it!
FAQs
Q1: Can I use different flavors of cake for my cake pops?
Absolutely! While chocolate is a classic choice for these valentines day cake pops, you can get creative with other flavors like red velvet, vanilla, or even lemon. Each cake flavor brings its own unique twist!
Q2: How long do I need to chill the cake balls?
You’ll want to chill the cake balls for at least 1 hour. This step is super important because it helps them firm up, making it easier to dip them in chocolate without falling apart. Trust me, it’s worth the wait!
Q3: What’s the best way to melt the chocolate coating?
The microwave is your best friend here! Melt the chocolate in short 30-second bursts, stirring in between until it’s smooth. Just be careful not to overheat it, or it might seize. Alternatively, you can use a double boiler for more control!
Q4: How do I store leftover cake pops?
You can store your valentines day cake pops in an airtight container at room temperature for up to a week. If you want to keep them fresher longer, you can also refrigerate them, but let them come to room temperature before serving for the best taste!
Q5: Can I make these cake pops ahead of time?
Definitely! You can make the cake balls ahead of time and chill them. Just dip them in chocolate closer to your celebration for the freshest taste. They also make great gifts, so think ahead and surprise someone special!
Why You’ll Love This Recipe
- Quick and Easy: With just a few simple steps, you can whip up these delightful cake pops in no time! They’re perfect for when you need a sweet treat fast.
- Fun for Everyone: Making cake pops is a blast! Involve your kids or friends in the decorating process for a fun bonding experience that everyone will cherish.
- Customizable: You can easily tailor these pops to suit your taste! Choose your favorite cake flavors, frostings, and decorations to make them uniquely yours.
- Perfect for Celebrations: Whether it’s Valentine’s Day, birthdays, or just because, these cake pops are a hit at any gathering. They’re bite-sized and easy to share!
- Gorgeous Presentation: With their vibrant colors and fun decorations, these cake pops are not only delicious but also visually stunning. They’ll steal the show on any dessert table!
- Great for Gifting: Wrap them up in cute packaging or present them in a sweet bouquet. They make heartfelt gifts that show you care, perfect for your loved ones!
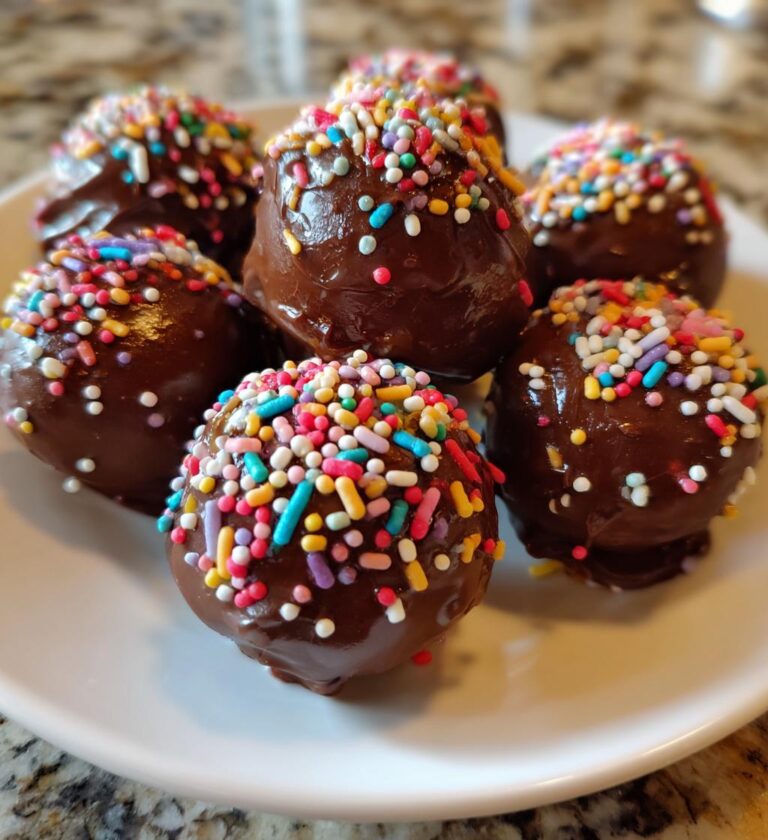
Valentines Day Cake Pops: 5 Sweet Treats to Adore
Delicious cake pops perfect for Valentine’s Day celebrations.
- Total Time: 1 hour 5 minutes
- Yield: 24 cake pops 1x
Ingredients
- 1 box of chocolate cake mix
- 3 eggs
- 1 cup of water
- 1/2 cup of vegetable oil
- 1 cup of frosting (any flavor)
- 12 oz of chocolate coating
- Sprinkles for decoration
Instructions
- Preheat your oven to 350°F (175°C).
- Prepare the cake mix according to package instructions.
- Pour the batter into a greased baking pan.
- Bake for 30-35 minutes, or until a toothpick comes out clean.
- Let the cake cool completely.
- Crumble the cooled cake into a large bowl.
- Add frosting to the crumbled cake and mix until combined.
- Roll the mixture into small balls and place them on a baking sheet.
- Chill the cake balls in the refrigerator for at least 1 hour.
- Melt the chocolate coating in a microwave-safe bowl.
- Dip the end of a lollipop stick into the melted chocolate, then insert it into a cake ball.
- Dip each cake pop into the chocolate coating and let the excess drip off.
- Sprinkle with decorations and let them set on a Styrofoam block.
Notes
- Use any cake flavor you like.
- Experiment with different coatings like white chocolate.
- Store in an airtight container for up to a week.
- Prep Time: 30 minutes
- Cook Time: 35 minutes
- Category: Dessert
- Method: Baking and coating
- Cuisine: American
- Diet: Vegetarian
Nutrition
- Serving Size: 1 cake pop
- Calories: 150
- Sugar: 10g
- Sodium: 50mg
- Fat: 6g
- Saturated Fat: 2g
- Unsaturated Fat: 4g
- Trans Fat: 0g
- Carbohydrates: 22g
- Fiber: 1g
- Protein: 2g
- Cholesterol: 30mg
Keywords: valentines day cake pops, cake pops, dessert, chocolate cake, sweet treats