
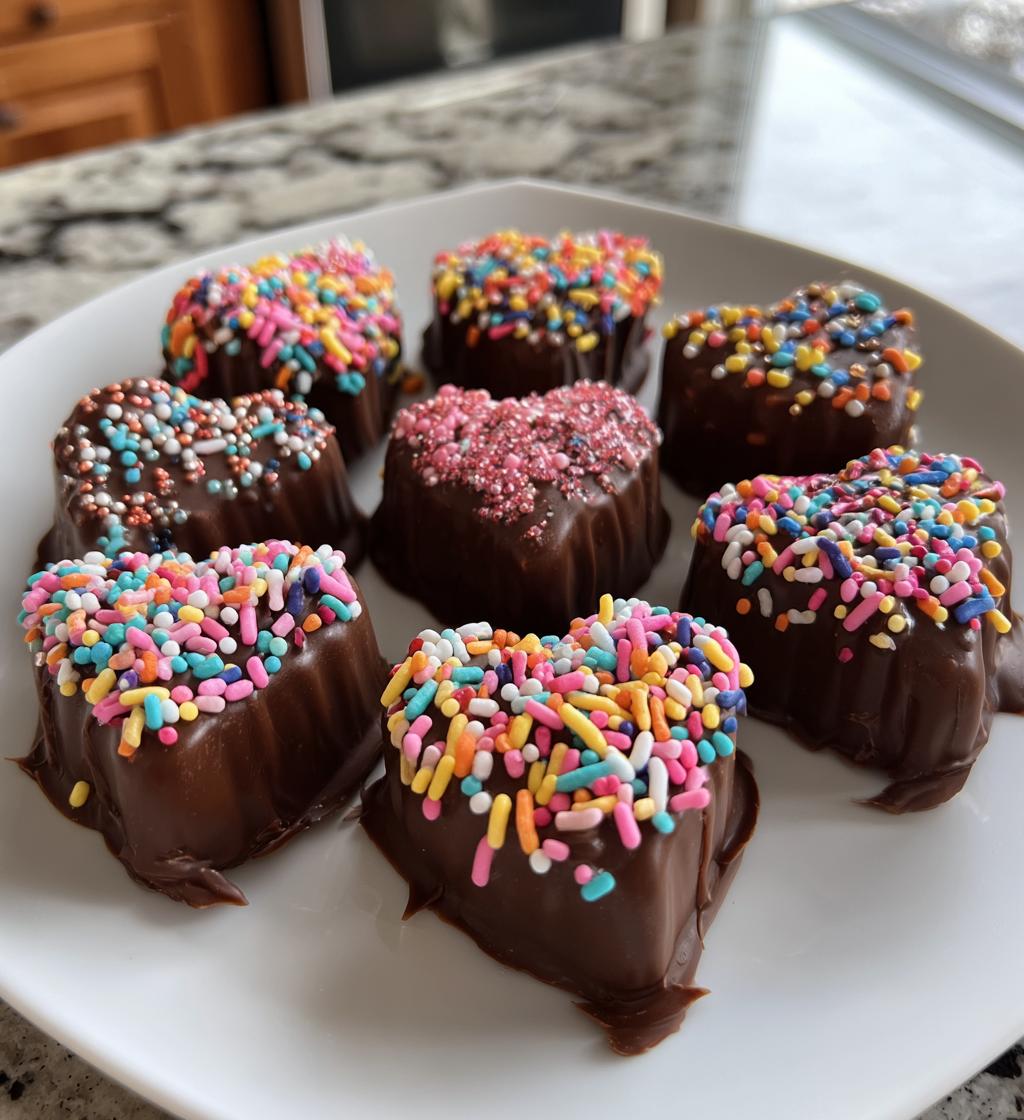
There’s something truly magical about making homemade treats for Valentine’s Day, don’t you think? The kitchen fills with sweet aromas, and the anticipation of sharing those delightful goodies with loved ones makes it all the more special. I remember my first time making these *valentines candies*—it was a whirlwind of melting sugar and laughter! It’s a wonderful way to show someone you care, whether it’s for a partner, a friend, or even just a little self-love. What I adore about this recipe is its simplicity; you don’t need to be a pro in the kitchen to whip up something that looks and tastes amazing. Plus, the joy of customizing your candies with colors and sprinkles makes it a fun project for everyone. So grab your apron, and let’s get ready to create some sweet memories with these delightful homemade treats!
Ingredients List
To create these delightful *valentines candies*, you’ll need some simple yet essential ingredients. Here’s what you’ll gather:
- 1 cup granulated sugar: This is the foundation for our candy, giving it that sweet crunch.
- 1/2 cup corn syrup: This helps prevent crystallization, ensuring your candies are smooth and chewy.
- 1/4 cup water: Just enough to help dissolve the sugar and keep things moving.
- 1 teaspoon vanilla extract: For that warm, comforting flavor that complements the sweetness.
- Food coloring: A few drops will add a festive touch—go wild with colors!
- 1 cup chocolate chips: These will be melted and used for dipping your candy pieces.
- Sprinkles for decoration: Because what’s a candy without a little sparkle?
How to Prepare *Valentines Candies*
Now that you’ve gathered your ingredients, let’s dive into the fun part—making your very own *valentines candies*! The process is straightforward, and I promise, you’ll be amazed at how quickly it all comes together. Just follow these easy steps, and you’ll have a delightful batch ready to share in no time!
Step-by-Step Instructions
First, grab a medium-sized saucepan and combine 1 cup of granulated sugar, 1/2 cup of corn syrup, and 1/4 cup of water. Place it over medium heat, stirring gently until the sugar is completely dissolved. This part is crucial—don’t rush it! You want a smooth mixture before moving on.
Once the sugar is dissolved, bring your mixture to a boil. You’ll want to keep an eye on it and let it cook until it reaches 300°F—this is known as the hard crack stage. You can use a candy thermometer for precision, but if you don’t have one, just look for that lovely bubbling and a slightly thick texture. This should take about 5 to 7 minutes, so be patient!
When it reaches the right temperature, carefully remove it from the heat and stir in 1 teaspoon of vanilla extract and your desired food coloring. I love adding a few drops of red or pink for that classic Valentine vibe! Pour the hot mixture onto a greased baking sheet, spreading it out evenly. Let it cool completely—this usually takes about 15-20 minutes.
Once your candy is cool and hardened, break it into pieces. Melt the 1 cup of chocolate chips in a microwave-safe bowl, stirring every 30 seconds until smooth. Dip each candy piece in the melted chocolate and sprinkle with your favorite decorations while the chocolate is still warm. And that’s it! Your homemade *valentines candies* are ready to impress and indulge!
Tips for Success
Making *valentines candies* is a delightful experience, but there are a few tricks to ensure everything turns out perfectly! First off, be sure to measure your ingredients accurately. Even a little extra sugar can throw off the consistency of your candy. When melting the sugar mixture, don’t walk away! Keep an eye on it; the transition from perfect to burnt can happen fast.
Also, remember to let the candy cool completely before breaking it into pieces. If it’s still warm, it might crumble unevenly. When you dip the candies in chocolate, ensure the chocolate is fully melted and smooth for an even coating. If you find it thickens, just pop it back in the microwave for a few seconds.
Lastly, don’t skimp on the decorations! Sprinkles and fun colors really make these candies pop. Enjoy the process, and don’t worry if they’re not perfect—homemade treats are about love and fun!
Variations of *Valentines Candies*
One of the best parts about making *valentines candies* is how easily you can customize them! Why not play around with different colors? You can create a whole rainbow of treats by using various food colorings—just imagine a box filled with vibrant reds, pinks, purples, and even blues! You might also experiment with flavors by adding a few drops of almond or mint extract instead of vanilla for a fun twist.
If you’re feeling adventurous, consider using molds to shape your candies into hearts, stars, or even cute little flowers. Silicone molds work wonderfully and make for easy removal. You could also layer different colors of candy for a beautiful striped effect! And for an extra special touch, try adding some chopped nuts or dried fruit to the melted chocolate before dipping. It’s a fantastic way to add texture and flavor, making each piece uniquely yours!
Nutritional Information
When it comes to indulging in these delightful *valentines candies*, it’s nice to know what you’re treating yourself to! Each piece contains approximately:
- Calories: 120
- Sugar: 20g
- Fat: 6g
- Saturated Fat: 3g
- Carbohydrates: 16g
- Protein: 1g
These values are estimates and can vary based on the specific ingredients and brands you use. So, while you’re enjoying these sweet treats, just keep in mind that a little indulgence is perfectly okay, especially when shared with loved ones!
FAQ Section
Got questions about making your own *valentines candies*? You’re not alone! Here are some common inquiries I’ve come across:
- Can I use different types of sugar? Absolutely! While granulated sugar is the base for these candies, you can experiment with brown sugar for a richer flavor. Just keep in mind it may change the texture slightly.
- What if I don’t have a candy thermometer? No worries! You can still achieve the perfect texture by watching for that lovely bubbling and letting it cook until it thickens. Just trust your instincts!
- How long do these candies last? If stored in an airtight container, your *valentines candies* will stay fresh for up to two weeks. But I doubt they’ll last that long!
- Can I add nuts or dried fruits? Yes! Chopped nuts or dried fruits can be mixed into the candy mixture before it hardens for an added crunch and flavor.
Feel free to get creative and ask more questions as you embark on your candy-making adventure!
Storage & Reheating Instructions
Storing your homemade *valentines candies* properly will keep them fresh and delicious for as long as possible! Once your candies have cooled completely, place them in an airtight container. I like to separate layers with parchment paper to prevent them from sticking together. This way, they’ll stay nice and pretty for sharing—or indulging later on!
These candies can last for up to two weeks at room temperature, but I bet they won’t last that long once you start sharing them with friends and family! If you live in a particularly humid area, consider storing them in the fridge to maintain their crunchiness. Just be careful when you take them out; let them come to room temperature before enjoying, as cold candies can be a bit too hard.
As for reheating, if you find your chocolate coating has hardened too much, you can gently warm it in the microwave for a few seconds, stirring until smooth again. Enjoy your sweet treats!
Why You’ll Love This Recipe
Making these *valentines candies* is a delightful experience, and here’s why you’ll absolutely adore this recipe:
- Easy Preparation: With just a handful of ingredients and simple steps, you can whip up a batch in no time!
- Customization Options: Play with colors, flavors, and shapes to create a truly personal treat that reflects your style.
- Perfect for Gifting: These candies make a heartfelt gift for loved ones, showing you care without breaking the bank.
- Fun for Everyone: Gather friends or family to help, turning candy-making into a fun activity filled with laughter and creativity!
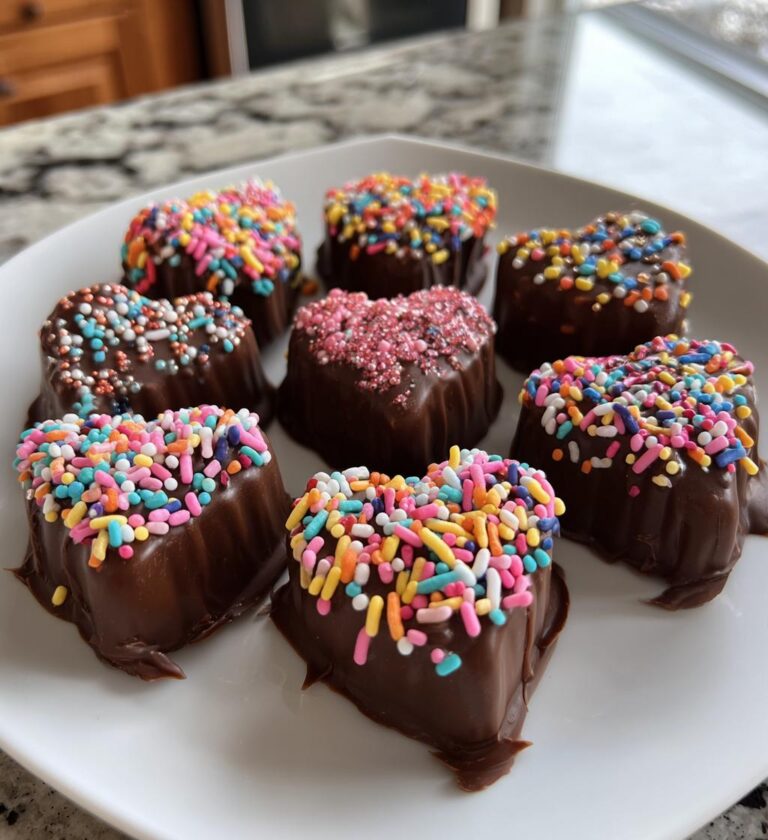
Valentines Candies: 5 Sweet Ideas to Melt Hearts
Delicious homemade Valentine’s candies.
- Total Time: 25 minutes
- Yield: 20 pieces 1x
Ingredients
- 1 cup granulated sugar
- 1/2 cup corn syrup
- 1/4 cup water
- 1 teaspoon vanilla extract
- Food coloring
- 1 cup chocolate chips
- Sprinkles for decoration
Instructions
- Combine sugar, corn syrup, and water in a saucepan over medium heat.
- Stir until the sugar dissolves.
- Bring the mixture to a boil and cook until it reaches 300°F (hard crack stage).
- Remove from heat and stir in vanilla extract and food coloring.
- Pour into a greased baking sheet and let cool.
- Once cooled, break into pieces.
- Melt chocolate chips and dip candy pieces.
- Sprinkle with decorations while chocolate is still warm.
Notes
- Store candies in an airtight container.
- Adjust food coloring for desired shades.
- Use various molds for different shapes.
- Prep Time: 15 minutes
- Cook Time: 10 minutes
- Category: Dessert
- Method: Stovetop
- Cuisine: American
- Diet: Vegetarian
Nutrition
- Serving Size: 1 piece
- Calories: 120
- Sugar: 20g
- Sodium: 5mg
- Fat: 6g
- Saturated Fat: 3g
- Unsaturated Fat: 2g
- Trans Fat: 0g
- Carbohydrates: 16g
- Fiber: 0g
- Protein: 1g
- Cholesterol: 5mg
Keywords: valentines candies