
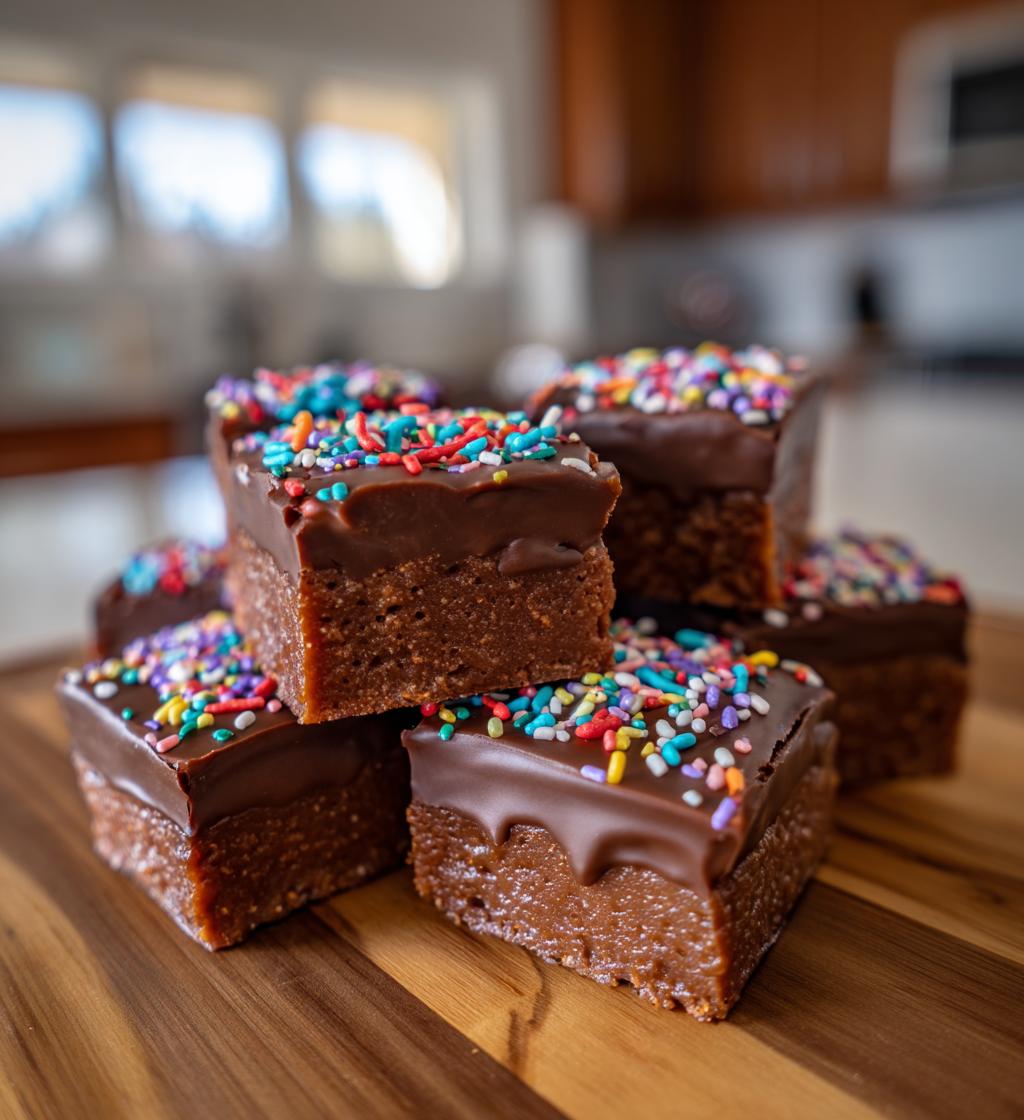
Valentine’s Day is such a magical time of the year, isn’t it? I absolutely love whipping up homemade sweets to share with my friends and family. There’s something so special about creating edible gifts filled with love, and trust me, this *valentines candy* recipe is a perfect example of that! It’s simple, quick, and oh-so-delicious. Just imagine the joy on your loved ones’ faces when they receive a little box filled with these sweet treats made right from your kitchen!
This recipe is a delightful blend of rich chocolate flavor and creamy goodness, all made in just about 25 minutes. With only a handful of everyday ingredients, you’ll find yourself in and out of the kitchen before you know it. Plus, you can easily customize it with nuts or festive sprinkles to make it even more special. So, whether you’re celebrating with a romantic dinner or hosting a fun get-together with friends, this *valentines candy* is sure to impress. Let’s dive into the ingredients and get started on spreading some sweet love!
Ingredients List
- 1 cup granulated sugar
- 1/4 cup unsweetened cocoa powder
- 1/2 cup heavy cream
- 1/4 cup unsalted butter
- 1 teaspoon vanilla extract
- 1/2 cup chopped nuts (optional)
How to Prepare Instructions
Now, let’s get to the fun part of making this delightful *valentines candy*! Trust me, the process is just as sweet as the final product. Here’s how you can whip up this treat step-by-step. Let’s dive in!
Step 1: Combine Ingredients
First things first, grab a medium saucepan and toss in your 1 cup of granulated sugar, 1/4 cup of unsweetened cocoa powder, and 1/2 cup of heavy cream. It’s essential to mix these dry ingredients with the cream thoroughly. You want to ensure there are no lumps, so stir them together until it’s nice and smooth. Make sure you’re stirring constantly! This helps prevent any burning and ensures everything blends beautifully. I always find it satisfying to see that rich chocolate color coming together.
Step 2: Boil the Mixture
Next, place your saucepan over medium heat. Keep stirring as you bring the mixture to a gentle boil. You’ll want to watch it closely because once it starts bubbling, you must let it boil for exactly 5 minutes without stirring. It’s tempting to keep stirring, but resist the urge! This is where the magic happens, and the mixture thickens beautifully. You’ll see it transform into a luscious chocolate sauce.
Step 3: Add Final Ingredients
Once those 5 minutes are up, it’s time to take the saucepan off the heat. Carefully stir in 1/4 cup of unsalted butter and 1 teaspoon of vanilla extract. The butter will melt right into that warm mixture, making it even richer. If you’re feeling a little nutty, now’s the time to toss in your 1/2 cup of chopped nuts if you want that extra crunch. Mix everything together until it’s well combined – oh, the aroma is just heavenly!
Step 4: Pour and Cool
Now, grab a greased pan (an 8×8 inch works perfectly) and pour in your chocolate mixture. Give it a little shake to spread it evenly. This part is crucial: let it cool completely at room temperature. I know it’s hard to resist that warm chocolate goodness, but cooling allows it to set perfectly. It should take about 30 minutes, so maybe go grab a cup of tea while you wait!
Step 5: Cut and Serve
Once it’s completely cooled, it’s time for the fun part – cutting it into squares! Use a sharp knife to slice it into bite-sized pieces. I like to serve mine on a pretty plate and maybe sprinkle a few festive decorations or sprinkles on top. You’ll want to enjoy these sweet squares with loved ones – they’re perfect for sharing or keeping all to yourself!
Why You’ll Love This Recipe
- Quick and Easy: With just a 25-minute total time, you can whip up a batch of these delicious treats without spending all day in the kitchen.
- Simple Ingredients: You only need a handful of everyday ingredients, making it super convenient and budget-friendly!
- Customizable: Feel free to get creative! Add in your favorite nuts or sprinkles to personalize your *valentines candy* and make it uniquely yours.
- Delicious Flavor: The rich chocolate flavor combined with buttery goodness will have everyone coming back for seconds (or thirds!).
- Perfect for Gifting: Whether you’re celebrating with a partner or hosting a gathering, these sweet squares make a lovely homemade gift that shows you care.
- Fun to Make: The entire process is a joy, from stirring the chocolate to cutting and decorating your candy. You’ll love every moment spent creating these sweet treats!
Tips for Success
Before you dive into making this fabulous *valentines candy*, let me share some of my favorite tips to ensure everything turns out perfectly. With a little care and attention, you’ll be a candy-making pro in no time!
Use Quality Ingredients
Trust me, the quality of your ingredients makes a world of difference! Opt for a good brand of cocoa powder and real unsalted butter. They bring out the rich chocolate flavor that makes this candy so special. I always prefer using fresh heavy cream, as it adds a lovely creaminess that really elevates the final product. Don’t skimp on those little details, they truly matter!
Be Mindful of Temperature
When you’re bringing that mixture to a boil, keep an eye on it! Medium heat is key here; too high, and you risk burning the sugar. If it starts to bubble over, just lower the heat slightly. Remember, patience is key during the boiling step – those 5 minutes can feel long, but they’re crucial for achieving that perfect consistency.
Let it Cool Completely
It might be tempting to sneak a taste of the warm mixture (and I won’t blame you if you do!), but let it cool completely before cutting. This allows the candy to set properly, giving you those clean, neat edges when you cut into squares. I usually set a timer for 30 minutes and use that time to clean up or prepare my serving plate!
Experiment with Add-Ins
If you want to spice things up, don’t hesitate to experiment with different nuts or even dried fruits. Chopped pecans or walnuts add a lovely crunch, while dried cherries or cranberries can bring a delightful tartness that pairs beautifully with the chocolate. Just remember to keep your add-ins balanced – you want them to complement the candy, not overpower it!
Store Properly
Once you’ve cut your candy, make sure to store it in an airtight container to keep it fresh. If you live in a warm climate, consider refrigerating it to maintain that perfect texture. You’ll want to enjoy this *valentines candy* at its best, and proper storage is the key to making that happen!
With these tips in hand, you’re all set to create some truly delightful homemade treats. Enjoy the process and most importantly, have fun sharing your sweet creations with your loved ones!
Storage & Reheating Instructions
Once you’ve cut your delicious *valentines candy* into those tempting squares, it’s important to store them properly to keep that rich flavor and texture intact. I always recommend placing the candy in an airtight container. This will help prevent them from drying out or picking up any unwanted odors from your fridge or pantry.
If you’re planning to enjoy your candy within a week, storing it at room temperature is just fine. Just make sure the container is kept in a cool, dry place away from direct sunlight. But if you live in a warmer climate or if it’s summertime, you might want to pop them in the fridge. Chilling them can help maintain their lovely texture and keep them fresh longer.
As for reheating, you really don’t need to! This candy is best enjoyed as is, right out of the container. However, if you want to bring back that melty chocolate goodness for a special treat, you can microwave a square for about 10-15 seconds. Just be careful not to overdo it—nobody likes a rubbery candy! A little warmth can bring out the flavors beautifully, but it’s always best to savor them at room temperature.
So, whether you’re stashing away some for later or sharing with friends, your homemade *valentines candy* will be a hit! Enjoy every sweet moment!
Nutritional Information Section
Now, let’s talk about the nutritional side of this delightful *valentines candy*. It’s always good to know what you’re indulging in, right? Here’s an estimated breakdown of the nutrition per piece, which is about 1 square:
- Calories: 100
- Sugar: 12g
- Fat: 6g
- Saturated Fat: 4g
- Unsaturated Fat: 2g
- Trans Fat: 0g
- Carbohydrates: 12g
- Fiber: 1g
- Protein: 1g
- Cholesterol: 15mg
- Sodium: 10mg
Keep in mind that these values are estimates and can vary based on the specific ingredients and brands you use. It’s always fun to enjoy treats like this in moderation, especially when they’re made with love! So go ahead, savor every bite of your homemade *valentines candy* knowing you’ve got a sweet treat that’s not only delicious but also made from simple ingredients.
FAQ Section
Got questions about making this delightful *valentines candy*? You’re not alone! Here are some of the most common queries I get, along with my answers to help you out:
Can I use different types of chocolate for this candy?
Absolutely! While this recipe calls for unsweetened cocoa powder, you can experiment with different types of chocolate. Using semi-sweet or dark chocolate will give your candy a richer flavor. Just remember that you might need to adjust the sugar if you go with sweeter chocolate options.
How do I ensure my candy sets properly?
The key to getting that perfect set is allowing your candy to cool completely at room temperature. It’s tempting to cut into it while it’s still warm, but patience is crucial! If you let it cool for about 30 minutes, it’ll firm up beautifully, giving you those clean, neat squares.
Can I make this candy ahead of time?
You bet! This *valentines candy* actually stores quite well. You can make it a few days in advance and keep it in an airtight container. It tastes just as delicious after sitting for a bit, and the flavors may even develop a little more over time. Just be sure to store it in a cool, dry place!
What can I use instead of nuts if I have allergies?
If you’re looking to skip the nuts due to allergies or just personal preference, that’s totally fine! You can leave them out entirely or replace them with seeds like sunflower or pumpkin seeds for a little crunch. Dried fruits like cranberries or cherries can also be a lovely addition for some chewy sweetness!
Can I freeze this *valentines candy* for later?
Yes, you can freeze your homemade candy! Just make sure to wrap each piece individually in plastic wrap and then place them in an airtight container or a freezer bag. When you’re ready to enjoy, simply thaw them in the fridge for a few hours or at room temperature for a quick treat. They’ll taste just as wonderful as the day you made them!
Print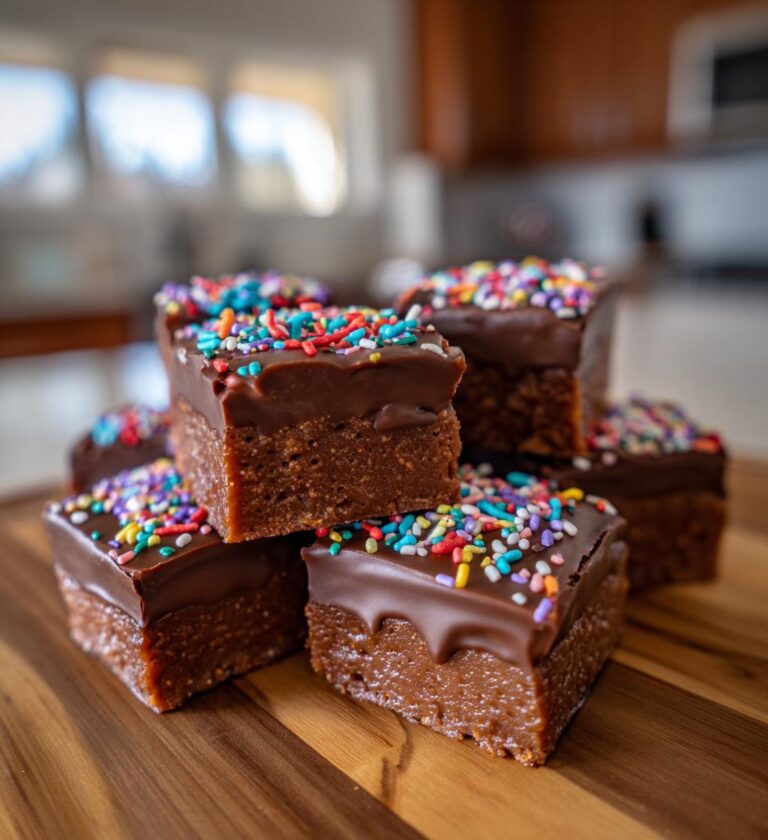
Valentines Candy: 5 Sweet Steps to Homemade Bliss
A delightful recipe for homemade Valentine’s candy.
- Total Time: 25 minutes
- Yield: 20 pieces 1x
Ingredients
- 1 cup granulated sugar
- 1/4 cup unsweetened cocoa powder
- 1/2 cup heavy cream
- 1/4 cup unsalted butter
- 1 teaspoon vanilla extract
- 1/2 cup chopped nuts (optional)
Instructions
- In a saucepan, combine sugar, cocoa powder, and heavy cream.
- Cook over medium heat, stirring constantly until the mixture boils.
- Continue to boil for 5 minutes without stirring.
- Remove from heat and stir in butter and vanilla.
- If using, add chopped nuts and mix well.
- Pour the mixture into a greased pan and let it cool completely.
- Once cool, cut into squares and serve.
Notes
- Store in an airtight container.
- Can be decorated with sprinkles for a festive touch.
- Prep Time: 10 minutes
- Cook Time: 15 minutes
- Category: Dessert
- Method: Stovetop
- Cuisine: American
- Diet: Vegetarian
Nutrition
- Serving Size: 1 piece
- Calories: 100
- Sugar: 12g
- Sodium: 10mg
- Fat: 6g
- Saturated Fat: 4g
- Unsaturated Fat: 2g
- Trans Fat: 0g
- Carbohydrates: 12g
- Fiber: 1g
- Protein: 1g
- Cholesterol: 15mg
Keywords: valentines candy, homemade candy, sweet treats