
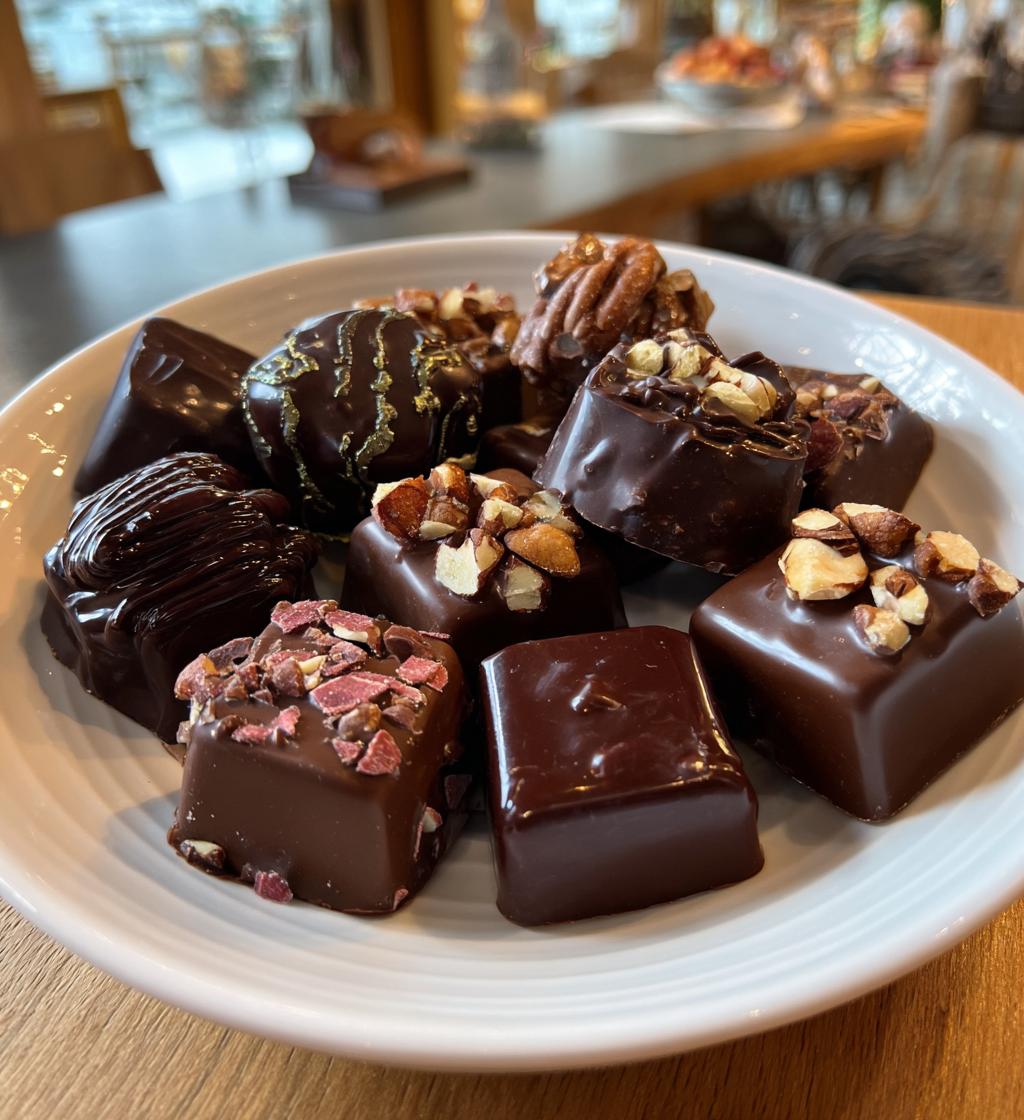
Ah, Valentine’s Day! A time for love, sweet surprises, and, of course, indulging in delicious homemade treats. There’s something truly special about gifting *valentines chocolate* that’s crafted with your own hands. It shows that you’ve put thought and care into your present. Plus, making chocolate at home is easier than you might think! With just a few simple ingredients, you can create rich, decadent bites that will charm anyone’s heart. Trust me, nothing compares to watching your loved ones’ eyes light up as they unwrap a piece of your homemade goodness. The best part? You can customize it to their taste! Whether it’s adding a sprinkle of sea salt or mixing in their favorite nuts, the possibilities are endless. So, let’s dive into this delightful journey of making your very own Valentine’s chocolate that’s sure to steal the show this February 14th!
Ingredients for Valentine’s Chocolate
- 1 cup dark chocolate chips – Make sure to use good quality chocolate for that rich flavor.
- 1/2 cup heavy cream – This adds the creamy texture that makes the chocolate so indulgent.
- 1 teaspoon vanilla extract – A splash of vanilla enhances the overall taste beautifully.
- 1/4 cup powdered sugar – Just the right amount to sweeten things up without overdoing it.
- 1/2 cup mixed nuts, chopped – Choose your favorites! They add a nice crunch and extra flavor.
How to Prepare Valentine’s Chocolate
Making your own valentines chocolate is a simple yet rewarding process. Follow these steps closely, and you’ll be on your way to creating delightful, heartwarming treats in no time!
Step 1: Melt the Chocolate
First things first, let’s get that chocolate melting! I always recommend using a double boiler for this step. If you don’t have one, no worries! Just set a heatproof bowl over a pot of simmering water, making sure the bowl doesn’t touch the water. Add your 1 cup of dark chocolate chips to the bowl and stir gently as it melts. This method helps the chocolate melt evenly without burning. Keep stirring until it’s silky smooth and completely melted. It’s like watching a magic potion come together—so satisfying!
Step 2: Combine Ingredients
Once your chocolate is perfectly melted, it’s time to make it creamy and delicious. Take that 1/2 cup of heavy cream and slowly pour it into the melted chocolate while stirring continuously. This is where the magic happens! Next, add in 1 teaspoon of vanilla extract and 1/4 cup of powdered sugar. Keep stirring until everything is combined and smooth. You want a rich, velvety mixture, so don’t rush this step—take your time and enjoy the process!
Step 3: Add Nuts
Now for a bit of crunch! Grab your 1/2 cup of chopped mixed nuts and gently fold them into the chocolate mixture. Use a spatula and be careful not to stir too vigorously; you want to keep the mixture nice and smooth. Folding helps to incorporate the nuts without breaking apart the beautiful chocolate blend. Trust me, this little crunch will make your chocolates even more delightful!
Step 4: Mold and Chill
Alright, it’s time to get that chocolate into molds! Pour your delicious mixture into chocolate molds of your choice. I love using heart-shaped molds for Valentine’s Day—it adds that sweet touch! Tap the molds gently on the counter to remove any air bubbles. Then, pop them in the refrigerator for at least 2 hours to set. This is the hardest part—waiting! But trust me, the anticipation is totally worth it. Once they’re firm, carefully remove them from the molds, and voila! You’ve got your homemade valentines chocolate ready to share (or keep for yourself—no judgment!).
Tips for Success
To ensure your valentines chocolate turns out perfectly every time, here are some of my favorite pro tips. Trust me, these little nuggets of wisdom can make a big difference!
- Use high-quality chocolate: Don’t skimp on the chocolate! The flavor of your chocolate will shine through, so choose a brand you love. It makes all the difference in taste.
- Be patient while melting: Chocolate can be finicky. Make sure to melt it slowly over low heat. If you rush it, you risk burning it, which can ruin your mixture.
- Let the chocolate cool slightly: Before you add the cream, let the melted chocolate cool for a minute or two. This helps prevent the cream from curdling and ensures a smooth blend.
- Experiment with flavors: Feel free to switch up the nuts or add extras like dried fruits, or even a sprinkle of sea salt on top before chilling. Get creative with your toppings!
- Keep molds clean: Make sure your molds are clean and dry before pouring in the chocolate mixture. Any moisture can affect how well the chocolate sets.
- Store properly: Keep your finished chocolates in a cool, dry place. If it’s warm, store them in the fridge, but let them come to room temperature before serving for the best flavor!
By following these tips, you’ll be on your way to creating perfect, homemade valentines chocolate that will impress everyone you share it with!
Nutritional Information
Here’s an estimated breakdown of the nutritional values for each piece of your delightful homemade valentines chocolate. Keep in mind that these values can vary based on the specific ingredients you use, but it’s a great guideline to keep in mind as you indulge!
- Calories: 150
- Fat: 12g
- Protein: 2g
- Carbohydrates: 15g
- Sugar: 10g
- Sodium: 5mg
- Fiber: 2g
- Cholesterol: 10mg
These little treats are definitely a sweet indulgence, but with a little moderation, they can be the perfect addition to your Valentine’s Day celebrations!
FAQ Section
Got questions about your homemade valentines chocolate? Don’t worry, I’ve got you covered! Here are some of the most common queries I get, along with helpful answers to guide you through your chocolate-making adventure.
Can I use milk chocolate instead of dark chocolate?
Absolutely! If you prefer a sweeter flavor, feel free to swap dark chocolate for milk chocolate. Just keep in mind that it will alter the taste and richness of your chocolate, but it’s still going to be delicious!
How should I store my homemade chocolates?
Store your finished chocolates in an airtight container in a cool, dry place. If it’s warm, the refrigerator works well too! Just remember to let them come to room temperature before serving to really enhance that rich flavor.
What if I don’t have a double boiler?
No problem! You can easily make a double boiler with a heatproof bowl set over a pot of simmering water. Just be sure the bowl doesn’t touch the water, and stir gently as the chocolate melts. It’s a simple hack that works like a charm!
Can I add other toppings to my chocolates?
Definitely! This is where you can get creative. Consider adding toppings like dried fruits, a sprinkle of sea salt, or even a drizzle of white chocolate for an extra layer of flavor. Just make sure to add them before chilling the chocolates!
How long will the chocolates last?
If stored properly, your homemade valentines chocolate should last about 1-2 weeks. However, they’re so tasty, they might not last that long! Just keep an eye on any changes in texture or smell, and if in doubt, it’s always best to err on the side of caution.
Can I make this recipe vegan?
Yes, you can! Look for dairy-free chocolate chips and substitute the heavy cream with a plant-based alternative like coconut cream or almond cream. Just be sure to check the labels to ensure they fit your dietary needs.
Feel free to reach out if you’ve got more questions. Happy chocolate making!
Why You’ll Love This Recipe
- Quick and Easy: With just 15 minutes of prep and a little chilling time, you can whip up these delightful chocolates in no time!
- Customizable: You can easily tweak the ingredients by adding your favorite nuts, dried fruits, or even flavored extracts to make it uniquely yours.
- Perfect for Gifting: These homemade valentines chocolate treats are not only delicious but also make heartfelt gifts that show you care.
- Impressive Presentation: Heart-shaped molds or decorative packaging make these chocolates look as good as they taste, perfect for impressing your loved ones!
- Rich and Decadent: The combination of dark chocolate and creamy filling creates a luxurious treat that satisfies any sweet tooth.
- Fun to Make: Get your loved ones involved in the chocolate-making process! It’s a fun activity to bond over and share delicious rewards.
Storage & Reheating Instructions
Once you’ve created your delicious valentines chocolate, you’ll want to make sure it stays fresh and tasty! Here’s how to store those sweet treats properly:
- Store in an Airtight Container: Place your chocolates in an airtight container to keep them safe from moisture and odors. This helps maintain their rich flavor and texture.
- Cool, Dry Place: Keep your container in a cool, dry place away from direct sunlight. A pantry or cupboard works perfectly! If it’s particularly warm, you can refrigerate them, but be sure to let them come to room temperature before enjoying.
- Separation: If you’re stacking chocolates, consider placing a piece of parchment paper between layers to prevent them from sticking together.
- Avoid Freezing: While you might be tempted to freeze your chocolates for longer storage, I recommend against it. Freezing can affect the texture and taste of your chocolates when they thaw.
Now, if you find yourself wanting to enjoy your chocolates warm or melted (hello, fondue!), here’s how to reheat them:
- Gentle Melting: Use the double boiler method again to gently melt your chocolates. This keeps them smooth and prevents burning. Just remember to watch closely!
- Microwave Method: If you’re in a hurry, you can microwave your chocolates in short 10-15 second intervals, stirring in between. Be super careful not to overheat them!
By following these simple storage and reheating tips, your homemade valentines chocolate will stay fresh and delicious, ready for you to indulge whenever that sweet craving hits!
Print
Valentines Chocolate: 5 Sweet Steps to Craft Your Love Treats
Delicious homemade Valentine’s chocolate
- Total Time: 2 hours 25 minutes
- Yield: 12 pieces 1x
Ingredients
- 1 cup dark chocolate chips
- 1/2 cup heavy cream
- 1 teaspoon vanilla extract
- 1/4 cup powdered sugar
- 1/2 cup mixed nuts, chopped
Instructions
- Melt the dark chocolate chips in a double boiler.
- Stir in the heavy cream until smooth.
- Add the vanilla extract and powdered sugar; mix well.
- Fold in the chopped nuts.
- Pour the mixture into a chocolate mold.
- Refrigerate for at least 2 hours until set.
- Remove from mold and serve.
Notes
- Use high-quality chocolate for best results.
- Feel free to add dried fruits or other toppings.
- Store in a cool, dry place.
- Prep Time: 15 minutes
- Cook Time: 10 minutes
- Category: Dessert
- Method: Stovetop
- Cuisine: American
- Diet: Vegetarian
Nutrition
- Serving Size: 1 piece
- Calories: 150
- Sugar: 10g
- Sodium: 5mg
- Fat: 12g
- Saturated Fat: 7g
- Unsaturated Fat: 3g
- Trans Fat: 0g
- Carbohydrates: 15g
- Fiber: 2g
- Protein: 2g
- Cholesterol: 10mg
Keywords: valentines chocolate, homemade chocolate, chocolate recipe