
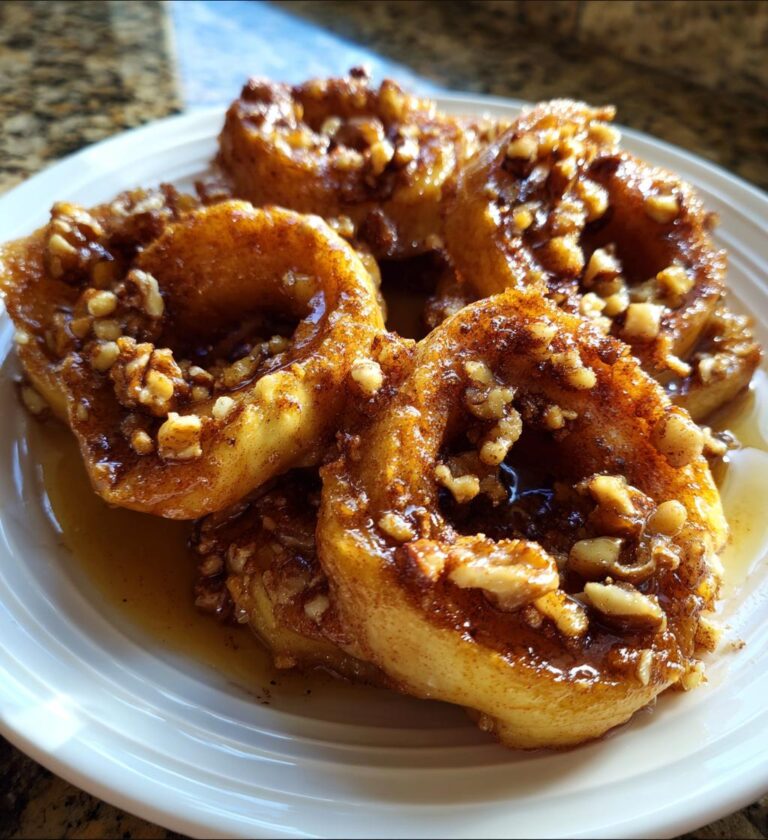
Oh my goodness, let me tell you about *air fryer baked apples*! This dessert is an absolute game-changer. Imagine biting into a warm, tender apple that’s perfectly caramelized with a sprinkle of cinnamon and a touch of sweet brown sugar. It’s like a cozy hug for your taste buds! I love how quick and simple it is to whip these up in the air fryer. In just 25 minutes, you can transform a few basic ingredients into a delightful treat that feels indulgent without being overly complicated. Plus, the air fryer gives these apples a gorgeous, slightly crispy exterior while keeping them soft and juicy on the inside. It’s the perfect dessert for a weeknight or a special occasion, and it fills your kitchen with the most heavenly aroma. Trust me; your family will be asking for seconds! So, let’s get ready to dive into this delicious recipe together!
Ingredients List
- 4 medium apples
- 2 tablespoons packed brown sugar
- 1 teaspoon ground cinnamon
- 1 tablespoon butter, melted
- 1/4 cup finely chopped walnuts
How to Prepare *Air Fryer Baked Apples*
Preheat the Air Fryer
First things first, let’s get that air fryer preheating to 350°F (175°C). Preheating is super important because it ensures that your apples will cook evenly and get that lovely caramelization we all love. Set your timer for about 5 minutes while you prepare the apples. Trust me, this little step makes a big difference!
Prepare the Apples
Now, onto the apples! Start by coring them with an apple corer or a knife if you don’t have one. Make sure to remove all the seeds, as they can be a bit of a surprise bite! After coring, slice the apples into rings about 1/4 inch thick. This thickness is perfect for getting that delightful tenderness while still holding their shape. You want them to be soft but not mushy!
Mix Ingredients
In a bowl, combine 2 tablespoons of packed brown sugar with 1 teaspoon of ground cinnamon. If your apples are on the tart side, feel free to adjust the sugar a bit—add a touch more if you like it sweeter! Mixing these two together will create a lovely fragrant blend that will really enhance the flavor of the apples.
Assemble the Apples
Time to bring it all together! Brush the apple rings with 1 tablespoon of melted butter. This not only adds flavor but helps the sugar mixture stick. Next, sprinkle that delicious brown sugar and cinnamon mix over the apples, making sure each ring gets a generous coating. Finally, sprinkle 1/4 cup of finely chopped walnuts on top. These will add a nice crunch and extra flavor!
Air Frying Process
Place the apple rings in the air fryer basket in a single layer, making sure they don’t overlap too much. You want them to have space to breathe and get that crispy goodness! Cook them for about 12-15 minutes, checking for tenderness halfway through. You can give them a little poke with a fork to see if they’re soft enough for your liking. If you want them extra caramelized, let them go a couple of minutes longer, but keep an eye on them!
Nutritional Information
Let’s talk about the nutritional goodness packed into these *air fryer baked apples*! Each serving is roughly one apple, and while I always recommend checking specific brands for exact values, here’s a typical breakdown for you:
- Calories: 150
- Fat: 5g
- Saturated Fat: 1g
- Unsaturated Fat: 4g
- Trans Fat: 0g
- Cholesterol: 5mg
- Sodium: 2mg
- Carbohydrates: 27g
- Sugar: 20g
- Fiber: 3g
- Protein: 2g
Keep in mind, these values are estimates and can vary based on the size of your apples and any adjustments you make. But hey, with all that wholesome fruit and nuts, you can feel good about indulging in this delightful dessert!
Tips for Success
Now that you’re on your way to making the most scrumptious *air fryer baked apples*, let’s talk about some tips to ensure everything turns out just right!
Choosing the Right Apples
First off, the type of apples you choose makes a huge difference! I love using Honeycrisp or Fuji apples because they’re sweet and hold up well during cooking. If you prefer a tart flavor, Granny Smith apples are a fantastic choice. Just remember, the sweeter the apple, the less brown sugar you might need to add. You can totally adjust the sugar to match your taste!
Watch the Cooking Time
Keep an eye on those apple rings as they cook. Every air fryer is a little different, so you might need to tweak the cooking time. If you like your apples a bit firmer, check them at the 10-minute mark; if you love them tender and mushy, let them go the full 15 minutes. You can always add a minute or two, but you can’t undo overcooked apples!
Serving Suggestions
Oh, and don’t forget about presentation! These baked apples are gorgeous on their own, but they really shine when served warm with a scoop of vanilla ice cream or a drizzle of caramel sauce. You can even top them with a dollop of whipped cream for a fancy touch. Trust me, your family and friends will be raving about your dessert skills!
Leftover Magic
If you happen to have any leftovers (which is rare in my house), store them in an airtight container in the fridge. They’ll keep well for a couple of days. You can reheat them in the air fryer for a few minutes to bring back that warm, cozy goodness. You can even use them as a topping for oatmeal or yogurt—so delicious!
With these tips in your back pocket, you’re all set to make the best *air fryer baked apples* ever. Happy cooking!
Variations
One of the best things about *air fryer baked apples* is how versatile they are! You can easily customize this recipe to suit your taste or what you have on hand. Here are some fun variations to consider:
Nutty Alternatives
If walnuts aren’t your thing, don’t worry! You can swap them out for pecans, almonds, or even hazelnuts. Each nut brings a different flavor and texture. I particularly love using pecans for their rich, buttery taste. Just remember to chop them up so they sprinkle nicely over the apples!
Dried Fruits for Extra Sweetness
Feeling adventurous? Toss in some dried fruits like raisins, cranberries, or even chopped dried apricots. They’ll add a delightful chewiness and a burst of flavor that compliments the tender apples. Just be mindful of the sweetness – you might want to reduce the brown sugar a tad if you add these in.
Spice It Up
While cinnamon is a classic, experimenting with spices can elevate your baked apples to new heights! Try adding a pinch of nutmeg for warmth or a dash of ginger for a zesty kick. If you’re feeling bold, a splash of vanilla extract or a bit of cardamom can also work wonders!
Stuffed Apples
For a more decadent treat, consider stuffing the apples! Core them as usual, but before adding the butter and sugar, fill the center with a mixture of oats, brown sugar, and a bit of melted butter. This creates a delicious crumbly topping inside that’s simply irresistible!
Maple Syrup Glaze
Instead of brown sugar, drizzle a little maple syrup over the apple rings for a different kind of sweetness. The maple flavor pairs beautifully with the apples and gives a lovely caramelized finish. Just remember to adjust the cooking time slightly, as syrup can make things a tad juicier.
With these variations, you can make *air fryer baked apples* your own every time you whip them up. Get creative, and enjoy the process! Happy baking!
Storage & Reheating Instructions
If you’re lucky enough to have some *air fryer baked apples* leftover (though I can’t say that happens often in my house!), storing them properly is key to keeping that deliciousness intact. Allow the apples to cool completely before transferring them to an airtight container. This helps prevent any moisture from building up, which can make them soggy. You can keep them in the fridge for up to three days. Just make sure to seal them tightly; no one wants a fridge full of apple-scented surprises!
When you’re ready to enjoy those warm, cozy treats again, reheating is a breeze! I recommend using the air fryer to bring back that slight crispiness. Preheat your air fryer to about 350°F (175°C) and pop the apples in for about 3-5 minutes. Keep an eye on them so they don’t overcook. You want them to be warmed through but still juicy and tender!
If you don’t have an air fryer handy, the microwave works too, but it might not give you that same delightful texture. Just place the apples on a microwave-safe plate, cover them with a damp paper towel, and heat in short bursts of about 30 seconds until warmed through. Be careful not to overdo it, or they might turn into mush instead of that lovely baked goodness we adore!
With these simple storage and reheating tips, you can enjoy your *air fryer baked apples* even after the initial excitement of baking them has passed. Happy snacking!
FAQ Section
Q1: Can I use different types of apples for this recipe?
Absolutely! Different apple varieties can bring unique flavors and textures to your *air fryer baked apples*. I love using Honeycrisp or Fuji apples for their sweetness and firmness, but if you prefer a tart flavor, Granny Smith apples work wonderfully too. Just remember that sweeter apples might require less brown sugar!
Q2: What can I do if I don’t have walnuts?
No worries at all! If walnuts aren’t your thing or you’re out of them, you can easily substitute them with pecans, almonds, or even sunflower seeds for a nut-free option. Each will add its own delightful crunch and flavor to your baked apples!
Q3: How do I know when the apples are done cooking?
Great question! You’ll want to check the apples for tenderness after about 12 minutes of cooking. A fork should easily pierce through them, but they shouldn’t be mushy. If you like them a bit firmer, feel free to pull them out earlier. Just keep an eye on them to reach your perfect level of doneness!
Q4: Can I make these baked apples ahead of time?
Yes, you can! While they’re best enjoyed fresh out of the air fryer, you can prepare the apple rings and mix the sugar and spice blend ahead of time. Just store everything in separate airtight containers in the fridge and assemble them when you’re ready to air fry. This way, you’ll have a quick and easy dessert ready to go!
Q5: What’s the best way to serve *air fryer baked apples*?
Oh, the possibilities are endless! You can serve them warm as is, or elevate them with a scoop of vanilla ice cream or a drizzle of caramel sauce. A sprinkle of whipped cream or a dusting of powdered sugar can also add a lovely touch. Trust me, your family and friends will be asking for your secret recipe!
Air Fryer Baked Apples: 5 Sweet Secrets to Cozy Bliss
A simple and delicious dessert made with apples baked in an air fryer.
- Total Time: 25 minutes
- Yield: 4 servings 1x
Ingredients
- 4 medium apples
- 2 tablespoons brown sugar
- 1 teaspoon cinnamon
- 1 tablespoon butter, melted
- 1/4 cup chopped walnuts
Instructions
- Preheat the air fryer to 350°F (175°C).
- Core the apples and slice them into rings.
- In a bowl, mix brown sugar and cinnamon.
- Brush the apple slices with melted butter.
- Sprinkle the sugar mixture over the apples.
- Add chopped walnuts on top.
- Place the apples in the air fryer basket in a single layer.
- Cook for 12-15 minutes until tender.
Notes
- Adjust sugar based on apple sweetness.
- Serve warm with ice cream if desired.
- Prep Time: 10 minutes
- Cook Time: 15 minutes
- Category: Dessert
- Method: Air Frying
- Cuisine: American
- Diet: Vegetarian
Nutrition
- Serving Size: 1 apple
- Calories: 150
- Sugar: 20g
- Sodium: 2mg
- Fat: 5g
- Saturated Fat: 1g
- Unsaturated Fat: 4g
- Trans Fat: 0g
- Carbohydrates: 27g
- Fiber: 3g
- Protein: 2g
- Cholesterol: 5mg
Keywords: air fryer baked apples, baked apples, air fryer dessert