
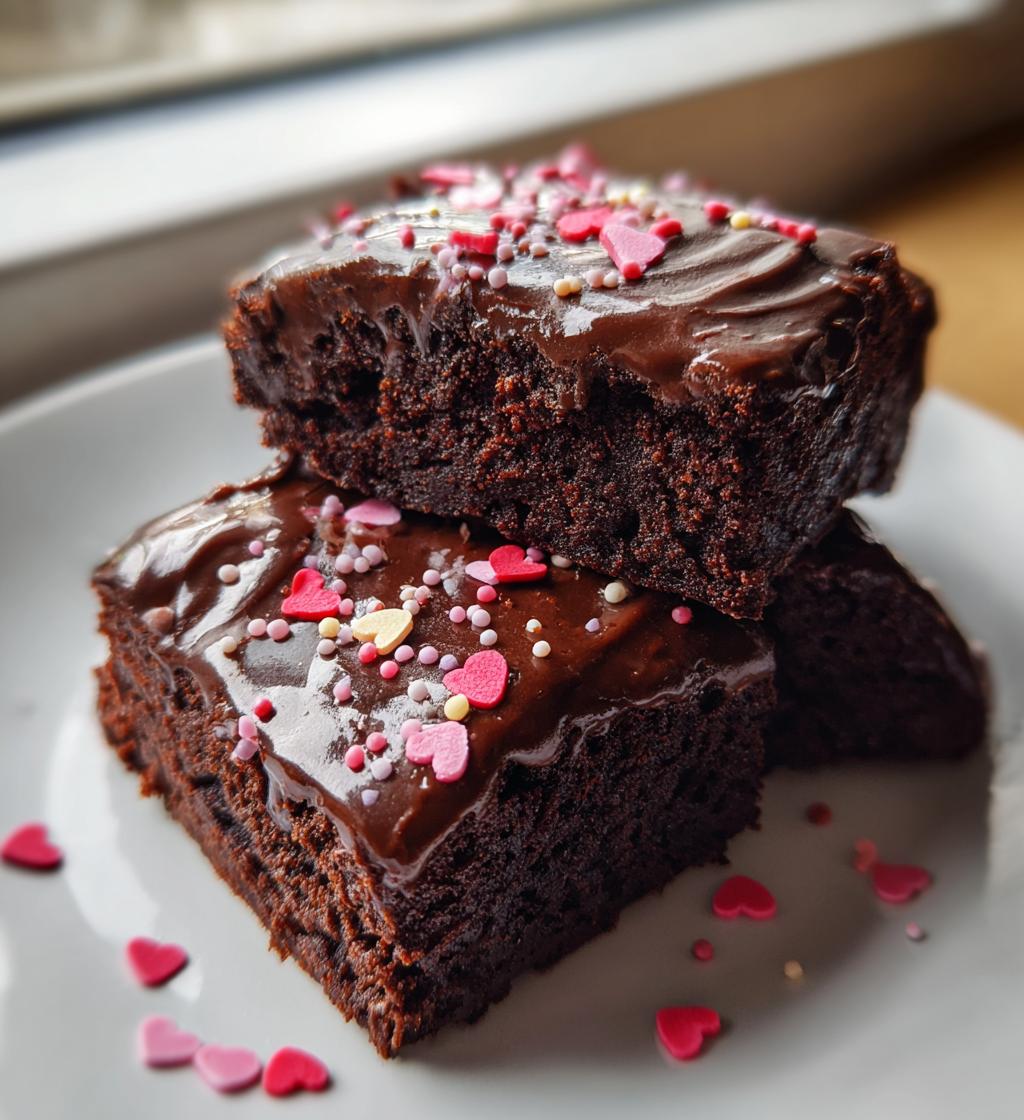
Valentine’s Day is one of my favorite occasions to whip up delicious sweet treats that bring joy and love into our homes. There’s something magical about baking for those you care about, and these treats are the perfect way to show you care. Trust me, when you fill your kitchen with the rich aroma of chocolate, it sets the stage for a cozy celebration. I still remember the first time I made these treats for my partner; it was a delightful surprise that ended with smiles and sweet moments. This recipe is simple yet oh-so-satisfying, making it ideal for anyone, whether you’re a baking novice or a seasoned pro.
With just a few ingredients and a little time, you can create these scrumptious delights that are sure to impress. Plus, they’re perfect for sharing! So, if you’re looking to make something special this Valentine’s Day, follow along, and I promise you won’t be disappointed. Grab your mixing bowl, and let’s dive into the world of sweet treats that will make hearts flutter!
Ingredients List
- 1 cup all-purpose flour – Make sure it’s leveled off for accurate measurement!
- 1/2 cup unsweetened cocoa powder – This gives our sweet treats that rich chocolate flavor.
- 1 cup sugar – Granulated sugar works best here for that perfect sweetness.
- 1/2 cup butter, softened – Let it sit at room temperature for easy creaming.
- 2 large eggs – These should be at room temperature for better mixing.
- 1 teaspoon vanilla extract – A splash of this adds a lovely aroma and flavor.
- 1/2 teaspoon baking powder – This helps our treats rise just the right amount.
- 1/4 teaspoon salt – A pinch to enhance all those sweet flavors.
- 1/2 cup chocolate chips – Go for semi-sweet or dark, depending on your taste!
How to Prepare Sweet Treats for Valentine’s Day
Step 1: Preheat Your Oven
First things first, you’ll want to preheat your oven to 350°F (175°C). This step is crucial because it ensures that your sweet treats bake evenly and rise just right. You can do this while you prepare the batter, so you’re ready to pop them in as soon as you finish mixing!
Step 2: Mix Dry Ingredients
In a mixing bowl, combine 1 cup of all-purpose flour, 1/2 cup of unsweetened cocoa powder, 1/2 teaspoon of baking powder, and 1/4 teaspoon of salt. Whisk them together until well blended. This simple step helps to evenly distribute the baking powder and salt, which is key for a uniform texture in your sweet treats. Trust me, it makes a difference!
Step 3: Cream Butter and Sugar
Now, grab another bowl and cream together 1/2 cup of softened butter and 1 cup of sugar. Using a hand mixer or a sturdy wooden spoon, beat them until the mixture is light and fluffy. You’re aiming for a texture that’s soft and airy—this will help your treats rise beautifully. It usually takes about 2-3 minutes.
Step 4: Combine Wet Ingredients
Next, add in 2 large eggs (make sure they’re at room temperature!) and 1 teaspoon of vanilla extract to the butter mixture. Mix everything until it’s well combined. The eggs add moisture and richness, while the vanilla will make your kitchen smell heavenly!
Step 5: Incorporate Dry Ingredients
Now it’s time to gradually add your dry ingredients to the wet mixture. I like to do this in three parts: add a third of the dry mix, gently stir until just combined, then repeat. This method helps keep the batter from becoming too dense. Don’t worry if you see a few flour streaks; just stop mixing when everything looks incorporated!
Step 6: Fold in Chocolate Chips
Once your batter is ready, it’s time to fold in 1/2 cup of chocolate chips. Use a spatula and gently lift the batter from the bottom to the top, turning it over. This way, you won’t break the chocolate chips, and they’ll be evenly distributed throughout the batter. It’s all about keeping that lovely texture!
Step 7: Bake the Sweet Treats
Pour the batter into a greased baking pan and spread it evenly. Pop it in the oven for 25-30 minutes. You’ll know they’re done when a toothpick inserted into the center comes out clean or with just a few moist crumbs attached. The aroma wafting through your kitchen will be irresistible!
Step 8: Cool Before Serving
Once baked, remove your sweet treats from the oven and let them cool in the pan for about 10 minutes before transferring them to a wire rack. This cooling step is super important; if you try to cut them too soon, they might crumble. Letting them cool ensures they hold together beautifully when you serve them up!
Why You’ll Love This Recipe
- Quick to Make: With just 15 minutes of prep time, you can whip these up in no time!
- Easy to Follow: Each step is straightforward, making it perfect for bakers of all skill levels.
- Deliciously Irresistible: The combination of rich chocolate and sweet chocolate chips creates a flavor that’s hard to resist.
- Perfect for Sharing: Whether it’s for a romantic dinner or a fun gathering with friends, these sweet treats are meant to be enjoyed together!
- Customizable: Feel free to add nuts or different types of chocolate chips to make them your own!
Tips for Success
Here are some of my favorite tips to ensure your sweet treats turn out perfectly every time!
- Measure Accurately: Baking is a science, so make sure you level off your flour and cocoa powder for precise measurements. Too much or too little can affect texture and taste!
- Room Temperature Ingredients: Use eggs and butter that are at room temperature. This helps them combine more easily and creates a smoother batter, leading to a better final product.
- Don’t Overmix: When combining the dry and wet ingredients, stir just until everything is incorporated. Overmixing can result in a denser texture, which we want to avoid!
- Use Quality Chocolate Chips: Opt for high-quality chocolate chips. Semi-sweet or dark chocolate works beautifully, providing that rich flavor that’ll take your treats to the next level.
- Check for Doneness: Don’t just rely on the time! Check for doneness with a toothpick and pay attention to the aroma. If it smells heavenly, you’re likely close to perfection!
- Cool Completely: Allow your sweet treats to cool fully before . This ensures they hold their shape and makes for prettier slices!
- Experiment with Toppings: Get creative! A sprinkle of sea salt on top before baking or a drizzle of melted chocolate after cooling can add an extra touch that elevates these sweet treats.
By following these tips, you’ll master the art of making sweet treats that not only taste amazing but also look beautiful. Happy baking!
Serving Suggestions
When it comes to serving these delightful sweet treats for Valentine’s Day, the options are as sweet as the treats themselves! Here are some ideas to elevate your dessert experience and impress your loved ones:
- Whipped Cream: A dollop of freshly whipped cream on top adds a light and creamy contrast to the rich chocolate. You could even sprinkle some cocoa powder or chocolate shavings on top for an extra special touch!
- Fresh Berries: Serve alongside a mix of fresh strawberries, raspberries, or blueberries. The tartness of the berries pairs beautifully with the sweetness of the chocolate, creating a balanced flavor profile that’s simply divine.
- Ice Cream: For a decadent option, try serving your sweet treats warm with a scoop of vanilla or raspberry ice cream. The melting ice cream combined with the warm chocolate creates a deliciously indulgent dessert experience!
- Chocolate Sauce: Drizzle some warm chocolate sauce over the top before serving. It adds an extra layer of chocolaty goodness that’s hard to resist. Plus, it looks great for presentation!
- Espresso or Coffee: Pair your sweet treats with a warm cup of espresso or rich coffee. The bold flavors of coffee enhance the chocolate and make for a delightful after-dinner treat.
- Fruit Compote: A homemade fruit compote, like a raspberry or cherry sauce, can add a lovely fruity element that complements the chocolate. Simply cook down your favorite berries with a bit of sugar and lemon juice for a vibrant topping!
These serving suggestions not only make your sweet treats even more enjoyable but also create a romantic atmosphere perfect for Valentine’s Day. So, gather your loved ones, set the table, and let the sweet moments unfold!
Storage & Reheating Instructions
Now that you’ve made these scrumptious sweet treats for Valentine’s Day, let’s talk about how to keep them fresh and delicious! Proper storage is key to enjoying them for days to come.
To store your sweet treats, let them cool completely first. Once cooled, place them in an airtight container. This keeps them moist and prevents any hardening or drying out. If you’re stacking them in the container, I recommend placing a piece of parchment paper between layers to avoid any sticking. They’ll stay fresh for up to 4-5 days at room temperature, but don’t be surprised if they disappear sooner!
If you want to keep them longer, you can freeze your sweet treats! Just wrap them tightly in plastic wrap and then place them in a freezer bag or airtight container. They’ll stay good for about 2-3 months in the freezer. When you’re ready to enjoy them, simply thaw them at room temperature for a few hours or pop them in the microwave for about 15-20 seconds. Just be careful not to overheat them, or they might dry out!
Reheating is a breeze! If you prefer them warm, you can microwave individual pieces as mentioned, or place them in a preheated oven at 350°F (175°C) for about 5-10 minutes. This warms them up beautifully without sacrificing texture. Just keep an eye on them to avoid overbaking!
With these storage and reheating tips, you can savor every last bite of your delightful sweet treats, making them even more enjoyable long after Valentine’s Day has passed. Happy snacking!
Nutritional Information
Understanding the nutritional value of your sweet treats is always helpful, especially when you want to enjoy them guilt-free! Below is the estimated nutritional information for one piece of these delightful sweet treats for Valentine’s Day. Keep in mind that these values can vary based on specific brands and ingredients used, but this gives you a good idea of what to expect:
- Calories: 150
- Fat: 7g
- Saturated Fat: 4g
- Unsaturated Fat: 2g
- Trans Fat: 0g
- Cholesterol: 30mg
- Sodium: 80mg
- Carbohydrates: 20g
- Fiber: 1g
- Sugar: 12g
- Protein: 2g
These sweet treats are not only delicious but also provide a nice balance of nutrients for a delightful dessert experience. Enjoy them as part of a balanced diet, and don’t forget to share the love this Valentine’s Day!
FAQ Section
Got questions about making these sweet treats for Valentine’s Day? Don’t worry, I’ve got you covered! Here are some common queries I often hear, along with my answers to help you bake with confidence.
Q1: Can I use a different type of flour for this recipe?
Absolutely! While all-purpose flour is my go-to for these sweet treats, you can experiment with alternatives like whole wheat flour or a gluten-free blend. Just keep in mind that the texture may change slightly, so you might need to adjust the liquid ingredients a bit.
Q2: How can I make these treats even more special for Valentine’s Day?
Oh, there are so many ways! You can add a touch of creativity by using heart-shaped cookie cutters to cut out the treats once they’ve cooled. Another fun idea is to sprinkle some festive red and pink sprinkles on top, or even drizzle a bit of white chocolate for that extra special touch!
Q3: Can I make this batter ahead of time?
Yes! You can prepare the batter a day in advance and store it in the fridge. Just let it come to room temperature before you bake it. However, I recommend baking fresh for the best texture and flavor. If you do make ahead, be sure to bake them within 24 hours for optimal results!
Q4: What’s the best way to serve these sweet treats?
These sweet treats are fantastic on their own, but for a romantic touch, consider serving them warm with a scoop of vanilla ice cream or a dollop of whipped cream. Fresh berries on the side also add a lovely contrast and make the presentation pop!
Q5: How can I store leftover sweet treats?
After they’ve cooled completely, store your sweet treats in an airtight container to keep them fresh. They’ll last about 4-5 days at room temperature, or you can freeze them for up to 2-3 months. Just remember to thaw them out when you’re ready to enjoy!
If you have any more questions, feel free to reach out! I love sharing tips and tricks to make your baking experience enjoyable and delicious.
Print
sweet treats valentines day: 7 recipes for love and joy
Delicious sweet treats perfect for Valentine’s Day.
- Total Time: 45 minutes
- Yield: 12 servings 1x
Ingredients
- 1 cup all-purpose flour
- 1/2 cup unsweetened cocoa powder
- 1 cup sugar
- 1/2 cup butter, softened
- 2 large eggs
- 1 teaspoon vanilla extract
- 1/2 teaspoon baking powder
- 1/4 teaspoon salt
- 1/2 cup chocolate chips
Instructions
- Preheat your oven to 350°F (175°C).
- In a bowl, mix flour, cocoa powder, baking powder, and salt.
- In another bowl, cream butter and sugar until light and fluffy.
- Add eggs and vanilla to the butter mixture and mix well.
- Gradually add the dry ingredients to the wet ingredients.
- Fold in the chocolate chips.
- Pour the batter into a greased baking pan.
- Bake for 25-30 minutes or until a toothpick comes out clean.
- Let cool before serving.
Notes
- Store leftovers in an airtight container.
- Try adding nuts for extra crunch.
- Serve with whipped cream for a special touch.
- Prep Time: 15 minutes
- Cook Time: 30 minutes
- Category: Dessert
- Method: Baking
- Cuisine: American
- Diet: Vegetarian
Nutrition
- Serving Size: 1 piece
- Calories: 150
- Sugar: 12g
- Sodium: 80mg
- Fat: 7g
- Saturated Fat: 4g
- Unsaturated Fat: 2g
- Trans Fat: 0g
- Carbohydrates: 20g
- Fiber: 1g
- Protein: 2g
- Cholesterol: 30mg
Keywords: sweet treats valentines day