
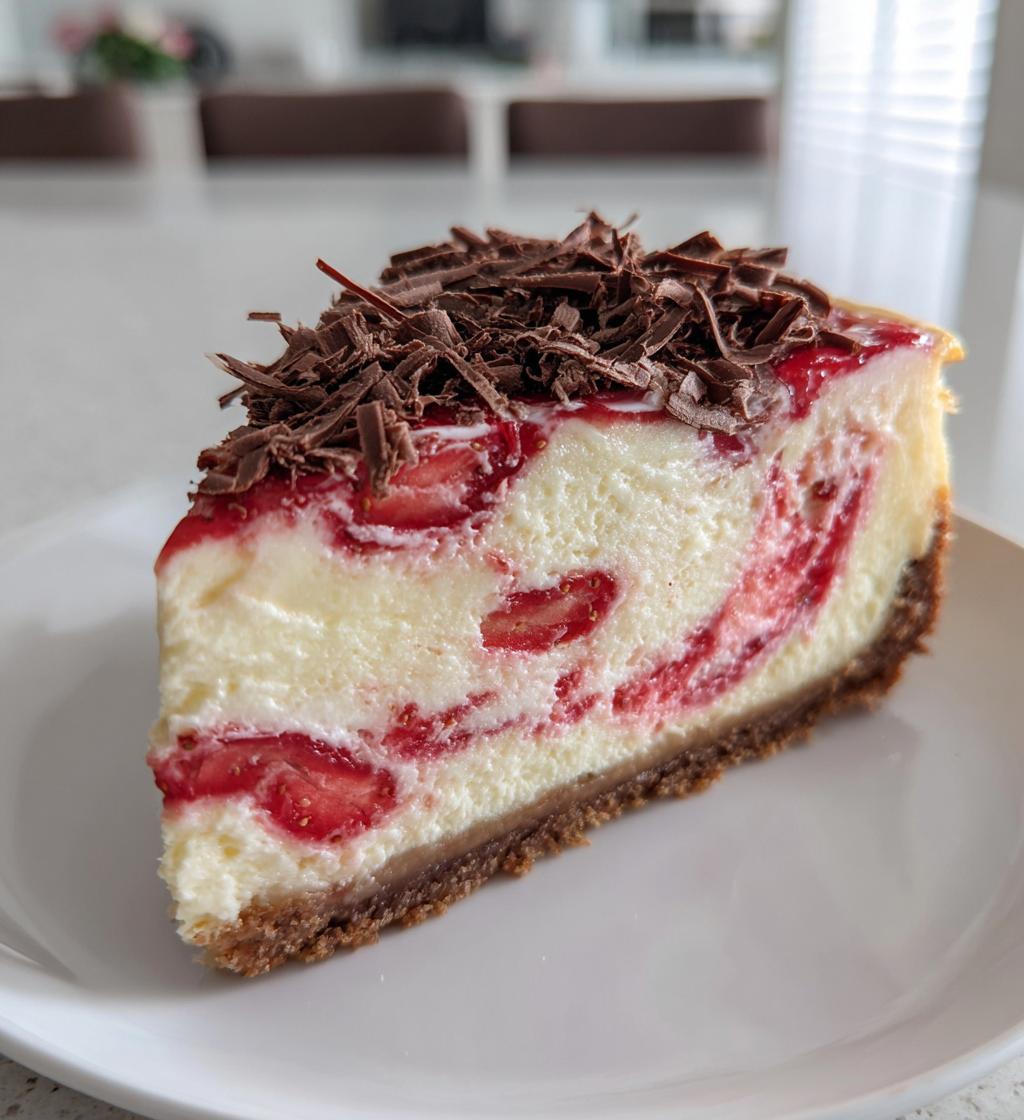
Ah, Valentine’s Day! It’s that magical time of year when love fills the air, and what better way to celebrate than with a luscious cheesecake? Trust me, these delightful cheesecake recipes will not only satisfy your sweet tooth but also set the perfect romantic atmosphere for your special night. Picture this: candlelight, soft music playing in the background, and the rich, creamy texture of cheesecake melting in your mouth. It’s pure bliss!
I’ve always had a soft spot for making cheesecakes, especially on Valentine’s Day. I remember the first time I surprised my partner with a homemade cheesecake. I was so nervous, but the moment they took a bite, their eyes lit up with joy. That look was priceless! It turned out to be a sweet success, and we ended up sharing not just the dessert but also laughter and love that night.
These cheesecake recipes are my go-to for any romantic occasion, and I can’t wait to share them with you! They’re not just desserts; they’re a way to express love and create unforgettable moments. So, let’s dive into the ingredients and get started on creating something truly special this Valentine’s Day!
Ingredients List
- 2 cups crushed graham cracker crumbs
- 1/2 cup unsalted butter, melted
- 1 cup granulated sugar
- 4 packages (8 ounces each) cream cheese, softened
- 1 teaspoon pure vanilla extract
- 4 large eggs
- 1 cup sour cream
- 1/2 cup fresh strawberries, pureed
- 1/4 cup chocolate shavings
How to Prepare Instructions
Alright, let’s get that oven preheated and dive into the delicious world of cheesecake making! Trust me, this step-by-step guide will have you creating a masterpiece that’s perfect for your Valentine’s celebration.
Preheat and Prepare the Crust
First things first, go ahead and preheat your oven to 325°F (160°C). This is crucial because a steady temperature helps your cheesecake bake evenly. While that’s warming up, grab a mixing bowl and combine your 2 cups of crushed graham cracker crumbs with 1/2 cup of melted unsalted butter. Mix it all together until it resembles wet sand. This is where the magic starts!
Now, take your springform pan and press the graham cracker mixture firmly into the bottom. You want it to be nice and compact, so don’t be shy—use your fingers or the bottom of a measuring cup to really pack it in. This crust will add such a lovely crunch and flavor, so make sure it’s even! Once that’s done, set it aside while we whip up the filling.
Prepare the Cheesecake Filling
Now for the star of the show! In a large mixing bowl, start beating together 4 packages (8 ounces each) of softened cream cheese and 1 cup of granulated sugar until it’s super smooth and creamy. You want to make sure there are no lumps here—it should feel like a soft cloud! This usually takes about 2-3 minutes of mixing.
Once it’s all smooth, it’s time to add in the eggs. Do this one at a time, mixing well after each addition. This helps incorporate air into the batter, making your cheesecake light and fluffy. After the eggs, stir in 1 teaspoon of pure vanilla extract and 1 cup of sour cream until everything is beautifully blended. This is where the flavor really comes together, creating that rich, creamy filling we all love.
Assemble the Cheesecake
Now for the fun part! Carefully pour half of the creamy cheesecake batter over your prepared crust. Spread it out evenly, but don’t stress too much—this part is forgiving. Next, take 1/2 cup of fresh strawberry puree and gently swirl it into the batter using a knife or a skewer. You want those lovely pink ribbons to show, so don’t over-mix! Finally, pour the rest of the cheesecake batter on top, smoothing it out so it’s nice and even.
Baking and Cooling Instructions
Pop your cheesecake into the preheated oven and let it bake for about 55-60 minutes. You’ll know it’s done when the edges are set, but the center still has a slight jiggle. Be careful not to over-bake—it’s key to that creamy texture! Once your cheesecake is done, turn off the oven and let it cool in the oven with the door slightly ajar for about an hour. This helps prevent cracking.
Finally, after it’s cooled down, refrigerate it for at least 4 hours, or ideally overnight. This chilling time helps all those flavors meld together beautifully and ensures it slices perfectly when you’re ready to serve. Trust me, the wait is worth it! Your Valentine’s cheesecake will be a delightful treat that steals the show.
Why You’ll Love This Recipe
- It’s easy to follow, making cheesecake accessible even for beginner bakers.
- Perfect for romantic occasions, creating a sweet and memorable dessert experience.
- Flavorful with the delightful combination of strawberry and chocolate, adding a touch of elegance.
- Vegetarian-friendly, so everyone can enjoy this luscious treat without worry.
Tips for Success
Now that you’re ready to whip up this dreamy cheesecake, let me share a few pro tips to help you achieve cheesecake perfection! Trust me, these little tricks can make all the difference.
Use Room Temperature Ingredients
First off, make sure your cream cheese, eggs, and sour cream are all at room temperature before you start mixing. This helps them blend together smoothly, which is key to a creamy texture. Cold ingredients can lead to lumps, and we definitely don’t want that! Just take them out of the fridge about an hour before you start baking.
Check for Doneness
When it comes to baking, keep an eye on your cheesecake! It’s tempting to rely solely on the timer, but every oven is different. Look for those edges that are set and a center that still jiggles slightly. Remember, it will firm up as it cools, so don’t be tempted to bake it until it’s completely solid. That jiggle is your friend!
Cooling is Key
After baking, let your cheesecake cool in the oven with the door slightly ajar for about an hour. This gentle cooling helps prevent cracks from forming on the surface. Once it’s cooled down, you can pop it in the fridge for at least 4 hours (or overnight if you can resist!). This chilling time allows the flavors to develop and ensures that each slice is perfectly smooth.
Keep it Covered
When storing your cheesecake, make sure to cover it well. I like to use plastic wrap or a cake dome to keep it fresh and prevent it from absorbing any fridge odors. Your cheesecake deserves to be treated like the star it is!
With these tips in your back pocket, you’re all set to impress your Valentine with a cheesecake that’s not just delicious but also beautifully made. Happy baking!
Variations
Now that you’ve mastered the classic strawberry cheesecake, let’s have some fun with variations that can add a twist to your romantic dessert! Trust me, these ideas will keep things exciting and personalized for your special occasion.
Change Up the Fruit Purees
If you’re in the mood for something different, try swapping out the strawberry puree for other delicious fruit purees. Raspberry or blueberry puree can add a vibrant color and tangy flavor that pairs beautifully with the creamy cheesecake. Just be sure to adjust the sweetness if the fruit is particularly tart!
Experiment with Extracts
Why not play with different flavors of extract? Instead of vanilla, consider using almond or coconut extract for a unique twist. A hint of almond can add a lovely depth of flavor, while coconut can make your cheesecake feel like a tropical getaway. Just remember, a little goes a long way, so start with half the amount you’d use for vanilla and adjust to taste.
Add Some Crunch
If you love a little texture in your dessert, think about incorporating nuts into your crust. Chopped pecans or walnuts mixed in with the graham cracker crumbs can add a delightful crunch and nutty flavor. Just toast them lightly in the oven before mixing them in—this enhances their flavor and makes your crust truly irresistible!
Chocolate Lovers Unite
For the chocolate aficionados out there, consider adding melted chocolate to your cheesecake batter. Just fold in about 1/2 cup of melted dark chocolate after mixing in the sour cream. This will give your cheesecake a rich, chocolatey flavor that’s sure to impress! You could also drizzle some chocolate sauce on top before serving for an extra decadent touch.
With these simple yet delightful variations, you can create a cheesecake that’s not only delicious but also a true reflection of your personal tastes. So, get creative and make this Valentine’s Day dessert uniquely yours!
Storage & Reheating Instructions
So, you’ve made this gorgeous cheesecake, and now it’s time to think about storage! Don’t worry, keeping it fresh is a breeze. First off, if you have any leftovers (which is rare, but hey, it happens!), make sure to cover your cheesecake well. I recommend using plastic wrap or a cake dome to protect it from absorbing any funky fridge odors. It’s all about keeping that creamy goodness intact!
Your cheesecake will stay fresh in the refrigerator for about 5 to 7 days. Just make sure it’s securely covered, and it’ll be ready to delight your taste buds whenever you want a sweet treat. If you’re planning to serve it later, you can also freeze the cheesecake! Just slice it into individual portions, wrap each slice tightly in plastic wrap, and place them in a freezer-safe container. It can last in the freezer for up to 2 months without losing its deliciousness.
When you’re ready to enjoy a slice from the freezer, just take it out and let it thaw in the fridge for a few hours or overnight. This slow thawing helps maintain that creamy texture we all love. If you’re in a hurry, you can set it out at room temperature for about 30 minutes, but be careful not to let it sit out too long to avoid any changes in texture.
If you want to enjoy your cheesecake warm, you can gently reheat it. Just pop a slice in the microwave for about 10-15 seconds. Keep an eye on it! You want it warmed through but not hot, so it stays creamy and delightful. Trust me, whether you’re savoring it cold or warm, this cheesecake is bound to bring a smile to your face!
Nutritional Information
Alright, let’s talk numbers! While I’m all about enjoying this delightful cheesecake, it’s also good to know what’s in it. Here’s a rough estimate of the nutritional values per slice, assuming you cut the cheesecake into 12 generous servings:
- Calories: 350
- Fat: 22g
- Saturated Fat: 12g
- Unsaturated Fat: 8g
- Trans Fat: 0g
- Cholesterol: 90mg
- Sodium: 220mg
- Carbohydrates: 30g
- Sugar: 25g
- Fiber: 1g
- Protein: 6g
Keep in mind, these values can vary based on the specific ingredients you choose and any fabulous twists you add to the recipe. It’s always a good idea to double-check if you’re counting macros or have dietary considerations. But no matter the numbers, one thing’s for sure: this cheesecake is a treat that’s worth every bite!
FAQ Section
Q1. Can I substitute the cream cheese for a lighter option?
Absolutely! If you’re looking for a lighter version, you can use Neufchâtel cheese instead of regular cream cheese. It has a similar taste and texture but with less fat. Just keep in mind that it might alter the creaminess slightly, but it’s still delicious!
Q2. How can I tell when the cheesecake is done baking?
Great question! The best way to check for doneness is to look at the edges of the cheesecake. They should be set, while the center will still have a slight jiggle when you gently shake the pan. This will ensure a creamy texture. Remember, it will firm up as it cools, so don’t overbake!
Q3. What if I don’t have a springform pan?
No worries at all! If you don’t have a springform pan, you can use a regular round cake pan. Just be sure to line the bottom and sides with parchment paper for easy removal. When it’s time to serve, carefully run a knife around the edges to loosen it before flipping it out onto a plate.
Q4. Can I make this cheesecake ahead of time?
Definitely! In fact, making it a day in advance is a fantastic idea. It allows the flavors to meld beautifully. Just be sure to cover it well in the fridge to keep it fresh. It will be ready to impress when you’re set to serve it!
Q5. What’s the best way to slice the cheesecake for serving?
For clean slices, I like to use a sharp, warm knife. Just dip the knife in hot water, wipe it off, and then slice through the cheesecake. This helps prevent the crust from crumbling and gives you those perfect, beautiful pieces. Plus, your guests will appreciate the neat presentation!
Q6. Can I use frozen strawberries for the puree?
Absolutely! If fresh strawberries aren’t available, frozen strawberries work just fine. Just thaw them first, and drain any excess liquid before pureeing. You’ll still get that delicious strawberry flavor that makes this cheesecake so special!
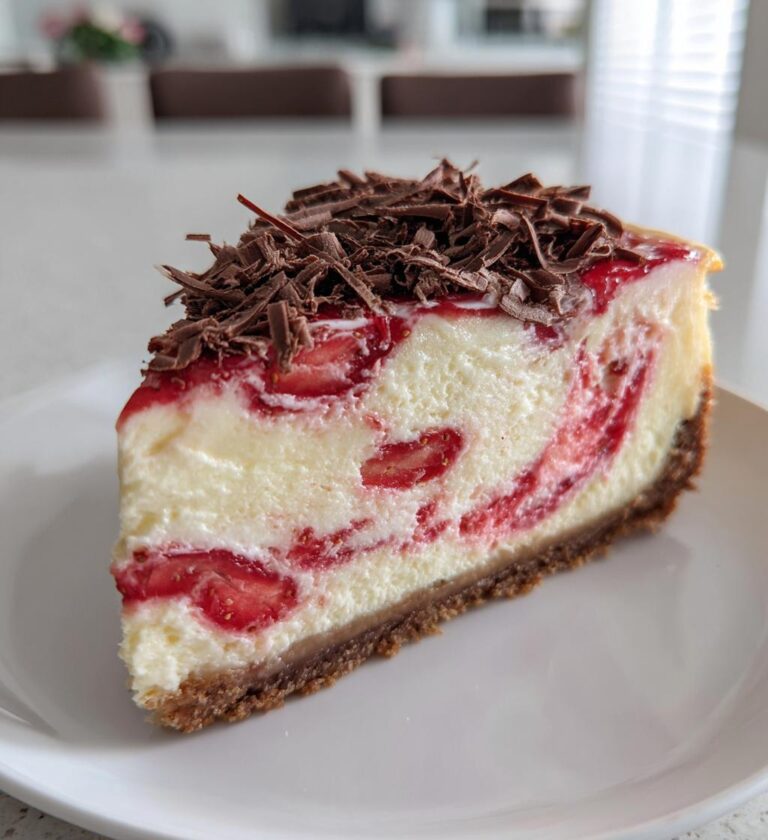
valentines cheesecake ideas for an unforgettable dessert experience
Delightful cheesecake recipes perfect for Valentine’s Day.
- Total Time: 4 hours 90 minutes
- Yield: 12 servings 1x
Ingredients
- 2 cups graham cracker crumbs
- 1/2 cup unsalted butter, melted
- 1 cup sugar
- 4 packages (8 ounces each) cream cheese, softened
- 1 teaspoon vanilla extract
- 4 large eggs
- 1 cup sour cream
- 1/2 cup fresh strawberries, pureed
- 1/4 cup chocolate shavings
Instructions
- Preheat the oven to 325°F (160°C).
- Mix graham cracker crumbs and melted butter in a bowl.
- Press the mixture into the bottom of a springform pan.
- Beat cream cheese and sugar together until smooth.
- Add eggs one at a time, mixing well after each.
- Stir in vanilla and sour cream.
- Pour half of the batter over the crust.
- Swirl in strawberry puree.
- Top with remaining batter.
- Bake for 55-60 minutes until set.
- Cool and refrigerate for at least 4 hours before serving.
Notes
- Use fresh strawberries for best flavor.
- Top with chocolate shavings before serving.
- Let cheesecake cool completely before refrigerating.
- Prep Time: 30 minutes
- Cook Time: 60 minutes
- Category: Dessert
- Method: Baking
- Cuisine: American
- Diet: Vegetarian
Nutrition
- Serving Size: 1 slice
- Calories: 350
- Sugar: 25g
- Sodium: 220mg
- Fat: 22g
- Saturated Fat: 12g
- Unsaturated Fat: 8g
- Trans Fat: 0g
- Carbohydrates: 30g
- Fiber: 1g
- Protein: 6g
- Cholesterol: 90mg
Keywords: valentines cheesecake ideas