
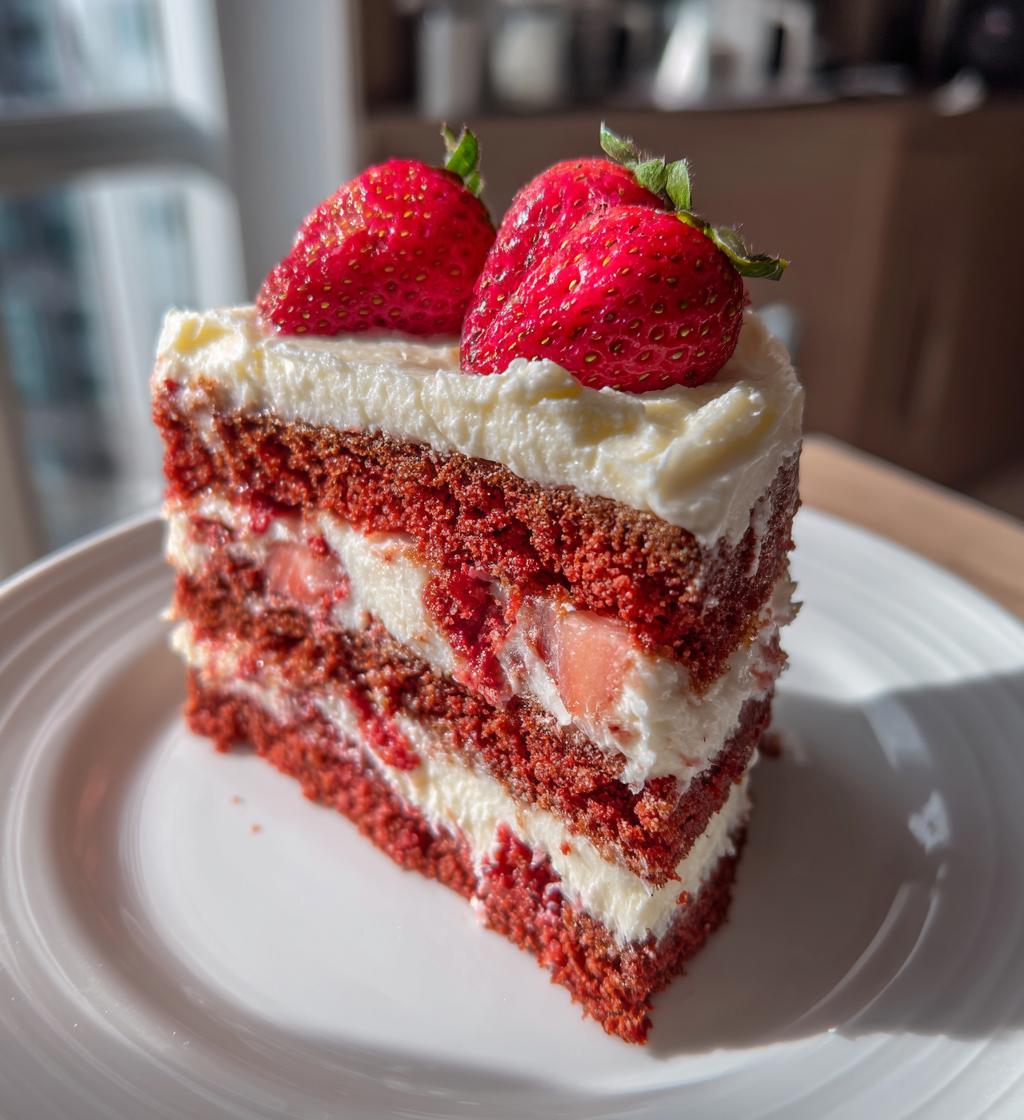
Valentine’s Day is just around the corner, and if you’re anything like me, you know that nothing says “I love you” quite like a homemade cake! This *Valentine’s Day cake* isn’t just any dessert; it’s a heartfelt expression of love, crafted with care. I still remember the first time I baked a cake for my partner – I was so nervous, but the joy on their face made it all worthwhile. The sweet aroma wafting through the kitchen brings back those lovely memories every time I whip up this recipe. It’s not just about the taste; it’s about sharing moments, laughter, and love over a slice of something delicious. Trust me, whether you’re celebrating with a partner, friends, or family, this cake will add that extra sprinkle of sweetness to your day. So, roll up your sleeves and let’s create something special together!
Ingredients List
To create this delightful *Valentine’s Day cake*, you’ll need a few simple yet essential ingredients. Make sure to gather everything before you start baking, so you’re all set for a smooth and enjoyable experience!
- 2 cups all-purpose flour
- 1 ½ cups sugar
- 1 cup unsalted butter, softened
- 4 large eggs, at room temperature
- 1 cup milk, preferably whole
- 2 teaspoons vanilla extract for that lovely flavor
- 1 ½ teaspoons baking powder to help it rise
- ½ teaspoon salt, just a pinch to balance the sweetness
- Red food coloring, enough to get that beautiful, romantic hue
- 1 cup cream cheese frosting for the perfect finish
Having these ingredients ready will set you up for success, and I promise you’ll love how they come together to create something truly special!
How to Prepare Instructions
Now that you’ve got all your ingredients ready, let’s get down to the fun part! I promise the process is straightforward, and I’ll walk you through each step to ensure your *Valentine’s Day cake* turns out perfectly.
Prepping the Oven and Pans
First things first, let’s get that oven preheated to 350°F (175°C). This step is crucial because you want your cake to bake evenly. While the oven warms up, grease and flour your two 9-inch round cake pans. I like to use a generous amount of butter for greasing – it makes for an easy release! If you want to be extra sure, you can also line the bottoms with parchment paper. Just trust me; you don’t want your beautiful cake to stick!
Mixing the Batter
In a large mixing bowl, cream together the softened butter and sugar until it’s light and fluffy – this takes about 3-5 minutes. You really want to incorporate air into the mixture; it makes the cake so much lighter! Next, add in the eggs one at a time, mixing well after each addition. This step is super important because each egg adds moisture and richness. Now, pour in the milk and vanilla extract, stirring gently until combined.
In a separate bowl, whisk together the flour, baking powder, and salt. Gradually mix this dry mixture into your wet ingredients. Don’t rush this part; take your time to ensure everything is blended well. Now comes the fun part! Add red food coloring to your batter until you reach that vibrant, romantic hue. Remember, it’s all about the color for this *Valentine’s Day cake*! Just be careful not to overmix – you want to see a few flour streaks before it’s done.
Baking the Cakes
Now, you’re ready to pour the batter evenly into your prepared pans. Slide them into the preheated oven and bake for 25-30 minutes. Keep an eye on them, as ovens can vary. To check for doneness, insert a toothpick into the center of the cakes. If it comes out clean or with just a few moist crumbs, you’re golden!
Cooling and Frosting
Once your cakes are baked to perfection, let them cool in the pans for about 10 minutes. Then, carefully transfer them to a wire rack to cool completely. It’s so tempting to frost them right away, but patience is key here! Once they’re cool, slather on that cream cheese frosting generously. You can even add some extra decorations like fresh strawberries on top for that added Valentine’s flair. Trust me, your loved ones will be swooning!
Why You’ll Love This Recipe
This *Valentine’s Day cake* is truly something special, and here’s why you’re going to fall head over heels for it:
- Easy Preparation: With straightforward steps and simple ingredients, baking this cake is a breeze, even for beginners!
- Delicious Flavors: The combination of buttery richness, a hint of vanilla, and that gorgeous cream cheese frosting creates a flavor explosion that’s simply irresistible.
- Perfect for Romantic Occasions: This cake is not just any dessert; it’s the centerpiece of your Valentine’s Day celebration, sure to impress your loved ones.
- Customizable Decor: You can make it your own with colorful decorations—think fresh strawberries or heart-shaped sprinkles to add that extra touch of love!
- Memorable Moments: Baking this cake creates a wonderful opportunity to share special moments with your partner, friends, or family, making it not just a dessert, but a heartfelt experience.
Trust me, once you bake this cake, it will become your go-to recipe for all your romantic celebrations!
Tips for Success
To make sure your *Valentine’s Day cake* turns out absolutely perfect, I’ve gathered some tried-and-true tips that will elevate your baking game. Trust me, these little nuggets of wisdom can make all the difference!
- Use Room Temperature Ingredients: Make sure your eggs and butter are at room temperature before mixing. This helps them blend together more smoothly, resulting in a lighter and fluffier cake.
- Quality Matters: Invest in good-quality vanilla extract and real butter. They pack so much flavor and really enhance the overall taste of the cake. It’s worth it for that delicious homemade touch!
- Measure Ingredients Accurately: Baking is a science, so be precise with your measurements. Use the spoon-and-level method for flour – scoop the flour into your measuring cup and level it off with a knife. This helps avoid a dense cake!
- Don’t Overmix: When combining the wet and dry ingredients, mix until just combined. Overmixing can develop gluten and lead to a tough cake, and we want it to be light and airy!
- Rotate the Pans: If your oven has hot spots (and most do!), rotate the cake pans halfway through baking. This ensures even cooking and helps avoid any uneven browning.
- Cool Completely: Allow your cakes to cool completely before frosting. If they’re even slightly warm, the frosting will melt and slide right off. Patience, my friend, is key!
- Have Fun with Decorations: Get creative with your frosting and toppings! Use fresh strawberries, edible glitter, or even a drizzle of chocolate to give it that extra special touch for Valentine’s Day.
With these tips, you’ll be set up for success in the kitchen! Enjoy the process and the joy of creating something delicious for your loved ones.
Serving Suggestions
Now that you’ve baked this gorgeous *Valentine’s Day cake*, let’s talk about how to make the experience even more special! The right accompaniments can elevate your cake from delicious to utterly unforgettable. Here are some delightful suggestions that’ll enhance your romantic celebration:
- Fresh Berries: Serve your cake with a side of fresh strawberries, raspberries, or blueberries. Their natural sweetness and tartness perfectly complement the rich cream cheese frosting, adding a burst of flavor and color to your plate.
- Whipped Cream: A dollop of homemade whipped cream adds lightness to each bite. Just whip some heavy cream with a tablespoon of sugar and a splash of vanilla until soft peaks form. It’s a simple yet luxurious touch!
- Chocolate Sauce: Drizzle some warm chocolate sauce over the cake slices for an indulgent twist. The combination of chocolate and red velvet is a classic match made in heaven!
- Ice Cream: Pair a slice with a scoop of vanilla or strawberry ice cream for that delicious hot-and-cold contrast. It’s like a party in your mouth!
- Aromas of Romance: Consider serving your cake with a pot of freshly brewed coffee or a rich cup of hot cocoa. These cozy beverages set the mood and make it an all-around comforting experience.
- Decorative Touch: Use heart-shaped plates or garnish the serving platter with rose petals for that extra touch of romance. Presentation is key, and it shows you put thought into the whole experience!
These serving suggestions will not only enhance the flavors but also create a warm, loving atmosphere that you and your loved ones will cherish. Enjoy every moment of your Valentine’s Day celebration, and don’t forget to share a slice or two!
Storage & Reheating Instructions
Once you’ve baked and frosted your delightful *Valentine’s Day cake*, you might find yourself with some delicious leftovers (if you’re lucky!). Storing your cake properly ensures it stays fresh and moist for those sweet moments to come. Here’s how to do it right:
- Storing Leftovers: If you have any leftover cake, it’s best to cover it tightly with plastic wrap or aluminum foil. This prevents it from drying out and keeps it fresh for up to 3 days at room temperature. If your home tends to be warm, you can store it in the fridge to keep it even fresher, but be sure to bring it back to room temperature before serving for the best taste!
- Freezing for Later: Planning ahead? You can freeze the cake! Just make sure it’s completely cooled before wrapping it tightly in plastic wrap, then place it in an airtight container or freezer bag. It can stay fresh in the freezer for up to 3 months. When you’re ready to enjoy it, simply thaw it overnight in the fridge and let it come to room temperature before serving.
- Reheating Tips: If you prefer your cake warm, you can reheat individual slices in the microwave. Just pop a slice on a microwave-safe plate and heat it for about 10-15 seconds. Keep an eye on it, as you don’t want it to get too hot or melt the frosting! Alternatively, you can place it in a preheated oven at 350°F (175°C) for about 5-10 minutes to warm it gently. This method will give it that freshly-baked feel!
With these storage and reheating tips, you’ll be able to savor every last bite of your *Valentine’s Day cake*. So go ahead, indulge a little longer and enjoy the love that’s baked right into each slice!
Nutritional Information Section
Understanding the nutritional value of your *Valentine’s Day cake* can be just as sweet as enjoying it! Here’s an estimated breakdown of what you’re getting in each slice, based on typical values:
- Serving Size: 1 slice
- Calories: 350
- Total Fat: 15g
- Saturated Fat: 9g
- Unsaturated Fat: 4g
- Trans Fat: 0g
- Cholesterol: 80mg
- Sodium: 200mg
- Total Carbohydrates: 50g
- Dietary Fiber: 1g
- Sugars: 30g
- Protein: 3g
Keep in mind these values are estimates and can vary based on specific ingredient brands and preparation methods. But hey, it’s Valentine’s Day, and a little indulgence is part of the celebration! Enjoy every delightful slice with love and joy!
FAQ Section
Got questions about this *Valentine’s Day cake* recipe? Don’t worry, I’ve got you covered! Here are some of the most common queries I get, along with my answers to help you bake with confidence:
Q1: Can I use a different type of frosting?
Absolutely! While cream cheese frosting is a classic choice that pairs beautifully with this cake, you can use any frosting you love. A chocolate ganache or a simple buttercream would also be delicious. Just remember to adjust the sweetness to your liking!
Q2: What if I don’t have red food coloring?
If you can’t find red food coloring, you can still make a delightful cake! Try using beet juice for a natural color or simply bake the cake without coloring for a lovely vanilla flavor. It won’t have that signature Valentine’s hue, but it’ll still be delicious!
Q3: How can I make this cake gluten-free?
To make a gluten-free *Valentine’s Day cake*, substitute the all-purpose flour with a gluten-free flour blend. Just ensure it’s a blend that contains xanthan gum or add a bit yourself to help with the cake’s structure. Your loved ones will never know the difference!
Q4: Can I prepare the batter in advance?
You can prepare the batter ahead of time! Just mix everything together and store it in the refrigerator for up to 24 hours before baking. When you’re ready to bake, let it sit at room temperature for about 30 minutes to get back to room temp before pouring it into the pans.
Q5: How do I know when the cake is done?
The best way to check for doneness is by using the toothpick test. Insert a toothpick into the center of the cake, and if it comes out clean or with a few moist crumbs, your cake is ready! Also, look for the edges pulling away slightly from the pan.
I hope these FAQs help you feel more prepared to create your own amazing *Valentine’s Day cake*! Happy baking!
Print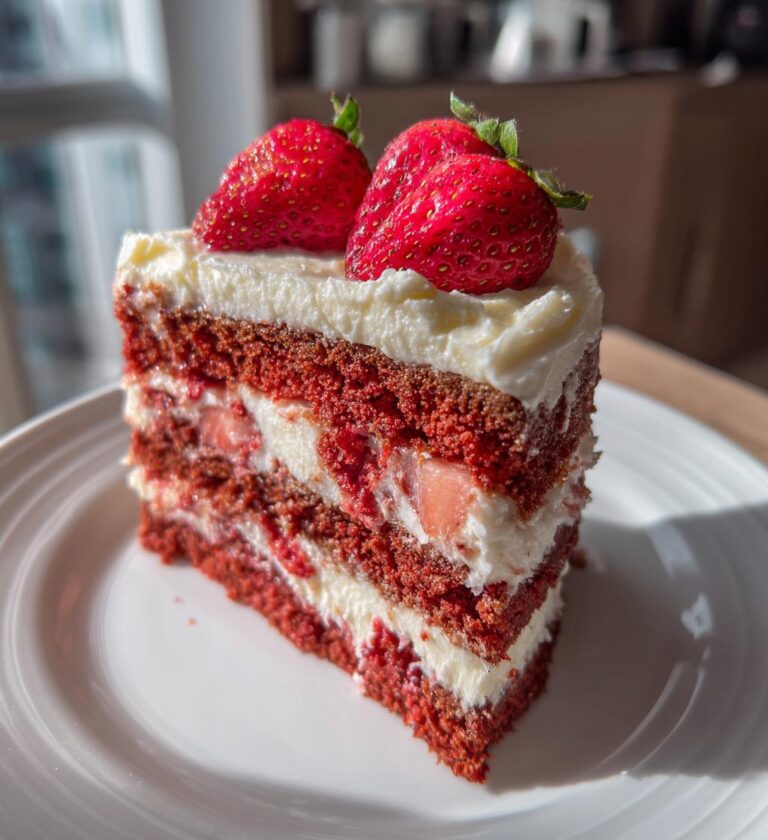
Valentine’s Day Cake: 5 Steps to Sweet Perfection
A delicious cake perfect for Valentine’s Day.
- Total Time: 50 minutes
- Yield: 12 servings 1x
Ingredients
- 2 cups all-purpose flour
- 1 ½ cups sugar
- 1 cup unsalted butter
- 4 large eggs
- 1 cup milk
- 2 teaspoons vanilla extract
- 1 ½ teaspoons baking powder
- ½ teaspoon salt
- Red food coloring
- 1 cup cream cheese frosting
Instructions
- Preheat your oven to 350°F (175°C).
- Grease and flour two 9-inch round cake pans.
- In a bowl, cream together the butter and sugar until light and fluffy.
- Add the eggs one at a time, mixing well after each addition.
- Stir in the milk and vanilla extract.
- In another bowl, combine the flour, baking powder, and salt.
- Gradually add the dry ingredients to the wet mixture.
- Mix in red food coloring to achieve desired color.
- Pour the batter evenly into prepared pans.
- Bake for 25-30 minutes or until a toothpick comes out clean.
- Let the cakes cool before frosting with cream cheese frosting.
Notes
- Store the cake in a cool place.
- Use a heart-shaped cake pan for a festive look.
- Decorate with fresh strawberries for added appeal.
- Prep Time: 20 minutes
- Cook Time: 30 minutes
- Category: Dessert
- Method: Baking
- Cuisine: American
- Diet: Vegetarian
Nutrition
- Serving Size: 1 slice
- Calories: 350
- Sugar: 30g
- Sodium: 200mg
- Fat: 15g
- Saturated Fat: 9g
- Unsaturated Fat: 4g
- Trans Fat: 0g
- Carbohydrates: 50g
- Fiber: 1g
- Protein: 3g
- Cholesterol: 80mg
Keywords: valentines day cake, romantic cake, dessert for couples