There’s something magical about cooking for the ones you love, especially when it comes to special occasions like Valentine’s Day. The aroma of something sweet baking in the oven fills the air, and it’s almost like your kitchen becomes a cozy little haven of warmth and love. These *Valentine’s Day recipes* are more than just food; they’re little tokens of affection that say, “I care about you.” I remember the first time I made a special dessert for my partner. I was so nervous, hoping it would turn out just right! But when they took the first bite, their eyes lit up, and I knew I had created something truly special.
These recipes are perfect for sharing, whether it’s with a significant other, friends, or family. They bring people together and create lasting memories around the table. Plus, who doesn’t love a little chocolate treat to sweeten the day? So, roll up your sleeves and get ready to whip up something delicious that’ll make those you love feel extra special! Trust me, this is where the magic happens.
Ingredients List
Here’s what you’ll need to create these delightful *Valentine’s Day recipes*. I promise, the combination of these ingredients makes for a truly irresistible treat!
- 2 cups of all-purpose flour
- 1 cup of sugar
- 1/2 cup of unsweetened cocoa powder
- 1 teaspoon of baking powder
- 1/2 teaspoon of salt
- 1 cup of milk
- 1/2 cup of vegetable oil
- 2 large eggs
- 1 teaspoon of vanilla extract
- 1 cup of chocolate chips
Make sure your ingredients are at room temperature, especially the eggs and milk; this helps create a smooth batter and ensures even baking. Trust me, it makes a difference! And don’t skimp on the chocolate chips—these little gems are what elevate the whole experience, adding pockets of gooey chocolate in every bite. Let’s get ready to bake something extraordinary!
How to Prepare *Valentines Day Recipes*
Now that you’ve gathered all your ingredients, it’s time to get your hands a bit dirty and bring this delicious creation to life! I’m here to guide you through each step, so don’t worry if you feel a little hesitant. Together, we’ll whip up something truly memorable for your loved ones!
Step-by-Step Instructions
First things first, let’s get that oven working for us! Preheat your oven to 350°F (175°C). This step is crucial because a hot oven is key to a perfectly baked treat. While that’s warming up, grab a mixing bowl and let’s tackle the dry ingredients.
In a large bowl, mix together 2 cups of all-purpose flour, 1 cup of sugar, 1/2 cup of unsweetened cocoa powder, 1 teaspoon of baking powder, and 1/2 teaspoon of salt. Make sure everything is combined well; you want to break up any cocoa clumps and ensure the baking powder is evenly distributed. Trust me, this is where the magic begins!
Now, let’s move on to the wet ingredients. In another bowl, whisk together 1 cup of milk, 1/2 cup of vegetable oil, 2 large eggs, and 1 teaspoon of vanilla extract. Make sure everything is mixed well—you want a smooth, creamy consistency. The vanilla is going to add such a delightful aroma that’ll make your heart flutter!
Once your wet ingredients are ready, pour them into the bowl with the dry ingredients. Gently mix everything together until it’s smooth—don’t overmix! A few small lumps are perfectly fine. Now, it’s time for the star of the show: fold in 1 cup of chocolate chips. These little morsels are going to melt beautifully and create pockets of chocolatey goodness throughout your dessert. Yum!
Next, pour the batter into a greased baking pan. I usually use a rectangular or square pan, but feel free to use what you have on hand. Just make sure it’s well-greased so your dessert slides out effortlessly when it’s done! Smooth the top a bit to ensure even baking—everyone deserves a lovely-looking dessert!
Now, pop that pan into your preheated oven and let the magic happen! Bake for about 30-35 minutes. You’ll know it’s done when a toothpick inserted into the center comes out clean or with just a few moist crumbs. Remember, it’s better to check a couple of minutes early—nobody wants a dry cake!
Once it’s out of the oven, let your creation cool in the pan for about 10-15 minutes before transferring it to a wire rack. This cooling time allows the flavors to settle in beautifully. Trust me, the aroma wafting through your kitchen will be worth the wait!
And there you have it! You’re just moments away from serving up a dessert that’s as sweet as your love. Enjoy the process, and don’t forget to taste along the way—you deserve it!
Nutritional Information
Before you dive into this deliciousness, it’s good to know what you’re working with! Keep in mind that nutrition can vary based on the specific brands and ingredients you use, so these values are just estimates. But here’s a general breakdown of what you can expect from each serving (1 piece):
- Calories: 250
- Fat: 10g
- Saturated Fat: 3g
- Unsaturated Fat: 5g
- Trans Fat: 0g
- Cholesterol: 30mg
- Sodium: 200mg
- Carbohydrates: 35g
- Fiber: 2g
- Sugar: 20g
- Protein: 4g
These tasty treats are rich and satisfying, perfect for sharing on a special day. Enjoy every bite, but remember, moderation is key! Whether you’re indulging on Valentine’s Day or just because, it’s all about savoring the moment with your loved ones.
Why You’ll Love This Recipe
- Quick Prep Time: With just 15 minutes of prep, you can whip up this dessert in no time, leaving you more moments to enjoy with your loved ones!
- Decadent Flavor: The rich chocolate flavor is sure to impress anyone who takes a bite. Trust me, it’s like love at first taste!
- Perfect for Any Occasion: While it’s a fantastic treat for Valentine’s Day, this dessert is also great for birthdays, anniversaries, or simply as a sweet surprise on a regular day.
- Easy to Customize: You can easily add your favorite toppings, like whipped cream or fresh strawberries, to make it uniquely yours!
- Make-Ahead Friendly: You can bake it a day in advance, making it an ideal choice for busy days when you still want to impress.
Tips for Success
To make sure your *Valentine’s Day recipes* turn out absolutely perfect, here are some of my favorite tips that I’ve learned over the years. Trust me, these little nuggets of wisdom can make a world of difference!
Use Room Temperature Ingredients
One of the biggest secrets to a smooth batter is using room temperature ingredients, especially your eggs and milk. This helps everything blend together harmoniously. If you forget to take them out ahead of time, no worries! Just place your eggs in warm water for about 10 minutes, and they’ll be good to go!
Don’t Overmix the Batter
When you’re combining the wet and dry ingredients, remember—less is more! Overmixing can lead to a dense and tough texture. Mix until everything is just combined, and don’t stress about a few lumps. Those lumps will bake away, and you’ll end up with a lovely, tender treat!
Keep an Eye on Baking Time
Ovens can vary, so it’s crucial to keep an eye on your dessert as it bakes. Start checking for doneness a few minutes earlier than the recipe suggests. If you poke a toothpick in and it comes out with a few moist crumbs, you’re golden! If it’s wet, give it a couple more minutes, but don’t overbake; nobody wants a dry dessert!
Let It Cool Properly
After pulling your dessert from the oven, be sure to let it cool in the pan for about 10-15 minutes before transferring it to a wire rack. This helps it set and makes for easier handling without breaking apart. Plus, you’ll get to enjoy that heavenly smell wafting through your kitchen!
Experiment with Toppings
Don’t be afraid to get creative with toppings! A dollop of whipped cream, a sprinkle of powdered sugar, or some fresh strawberries can elevate your dessert to a whole new level. You could even drizzle some melted chocolate over the top for that extra wow factor. Go ahead, make it special!
Store Properly for Freshness
If you happen to have leftovers (which I doubt, because it’s so good!), store them in an airtight container at room temperature for up to three days. For longer storage, keep them in the fridge. Just remember to let them come to room temperature or warm them slightly in the microwave before serving for the best taste!
With these tips, you’re all set for a delicious success! Enjoy the baking process, and don’t forget to sprinkle in a little love along the way!
Variations
Now that you’ve mastered the classic version of these *Valentine’s Day recipes*, let’s have some fun with variations! There are so many creative ways to personalize this dessert and make it uniquely yours. Trust me, your loved ones will be impressed with your creativity!
Flavor Twists
- Mint Chocolate: Add a teaspoon of peppermint extract to the wet ingredients for a refreshing minty flavor that pairs beautifully with chocolate. You could also garnish with crushed peppermint candies for a festive touch!
- Mocha Delight: Swap out half of the cocoa powder for finely ground coffee or espresso powder. This adds a lovely coffee kick that’s perfect for coffee lovers!
- Peanut Butter Swirl: Before baking, drop spoonfuls of creamy peanut butter into the batter and use a knife to swirl it in. It creates a deliciously nutty surprise in every bite!
Creative Toppings
- Berry Bliss: Top your dessert with fresh strawberries, raspberries, or blueberries. A quick sprinkle of powdered sugar or a drizzle of chocolate sauce will elevate it even more!
- Nutty Crunch: Add a handful of chopped nuts—like walnuts or pecans—into the batter or sprinkle them on top for added texture and flavor. Toasting them lightly beforehand enhances their nuttiness!
- Whipped Cream Heaven: Serve each piece with a generous dollop of homemade whipped cream flavored with a splash of vanilla and a bit of sugar. It’s a classic pairing that’s always a hit!
Extra Ingredients
- Cherries or Dried Fruits: Fold in some maraschino cherries or your favorite dried fruits, like cranberries or apricots, to add a pop of color and flavor. They’ll bring a lovely sweetness that complements the chocolate.
- Chocolate Variations: Feel free to mix in different types of chocolate chips—dark, white, or even butterscotch! Each brings a unique flavor profile that can change the whole vibe of your dessert.
- Spices for Warmth: Add a pinch of cinnamon or a dash of cayenne pepper to the batter for a subtle warmth and depth of flavor. It’s a delightful twist that can surprise your taste buds!
The beauty of these *Valentine’s Day recipes* is that they’re incredibly versatile! So, don’t hesitate to experiment and tailor them to your taste. Have fun and let your creativity shine in the kitchen—you never know what delicious new combinations you might discover!
Storage & Reheating Instructions
After you’ve made these delightful *Valentine’s Day recipes*, you might find yourself with some delicious leftovers (if you’re lucky!). Storing them correctly is key to keeping that rich flavor and moist texture intact. Here’s how to do it!
Storing Leftovers
First things first, let your dessert cool completely before storing it. This step is crucial because if you put warm cake into a container, it can create condensation, leading to sogginess—yikes! Once cooled, wrap the dessert tightly in plastic wrap or aluminum foil, or place it in an airtight container. This will help keep it fresh and prevent it from drying out.
It’s best to store your leftovers at room temperature for about 2-3 days. If you want to keep them for longer, pop them in the fridge, where they can last up to a week. Just be sure to let them come to room temperature before serving again, as chilling can dull the flavors a bit. Trust me, you want every bite to be as delicious as the first!
Reheating Instructions
If you prefer to enjoy your dessert warm (and who doesn’t love a warm piece of chocolate goodness?), reheating is super simple! You can do this in a couple of ways:
- Microwave: Place a piece on a microwave-safe plate and heat it for about 10-15 seconds. Check to see if it’s warm enough; if not, give it another few seconds. Just be careful not to overdo it, or you might end up with a rubbery texture!
- Oven: For a more even heating, preheat your oven to 350°F (175°C). Wrap the dessert in aluminum foil and heat it for about 10-15 minutes. This method helps maintain moisture and brings back that freshly baked taste!
With these simple storage and reheating tips, you can savor your *Valentine’s Day recipes* even after the special day has passed. Enjoy every last bite, and don’t forget to share with those you love—because what’s better than sharing delicious treats created from the heart?
Serving Suggestions
Now that you’ve whipped up these delightful *Valentine’s Day recipes*, let’s talk about how to elevate the whole dining experience! Pairing your dessert with the right dishes and beverages can really enhance the flavors and create a romantic atmosphere. Here are some of my favorite ideas:
- Fresh Berries: Serve your dessert alongside a mix of fresh strawberries, raspberries, or blueberries. Their natural sweetness and slight tartness complement the rich chocolate perfectly, adding a vibrant touch to your plate!
- Whipped Cream: A generous dollop of freshly whipped cream is always a hit! You can even flavor it with a splash of vanilla or a hint of almond extract for an extra special touch. It adds a lovely creaminess that balances the cake beautifully.
- Vanilla Ice Cream: Nothing beats the classic combo of warm chocolate treats with a scoop of vanilla ice cream! The cold creaminess melts slightly into the warm dessert, creating a heavenly contrast that everyone loves.
- Aromatic Coffee: Brew a fresh pot of coffee or serve up some rich espresso. The deep flavors of coffee enhance the chocolate notes in your dessert, making each bite taste even more indulgent.
- Sweet Red Wine: For an adult twist, consider pairing your treat with a glass of sweet red wine or even a fruity dessert wine like Port. The wine’s rich flavors will complement the chocolate and elevate your dessert experience.
These simple pairings can turn an already special dessert into a memorable feast! So, set the table, light some candles, and enjoy your creation with loved ones. Trust me, it’s all about making those moments extra sweet!
Print
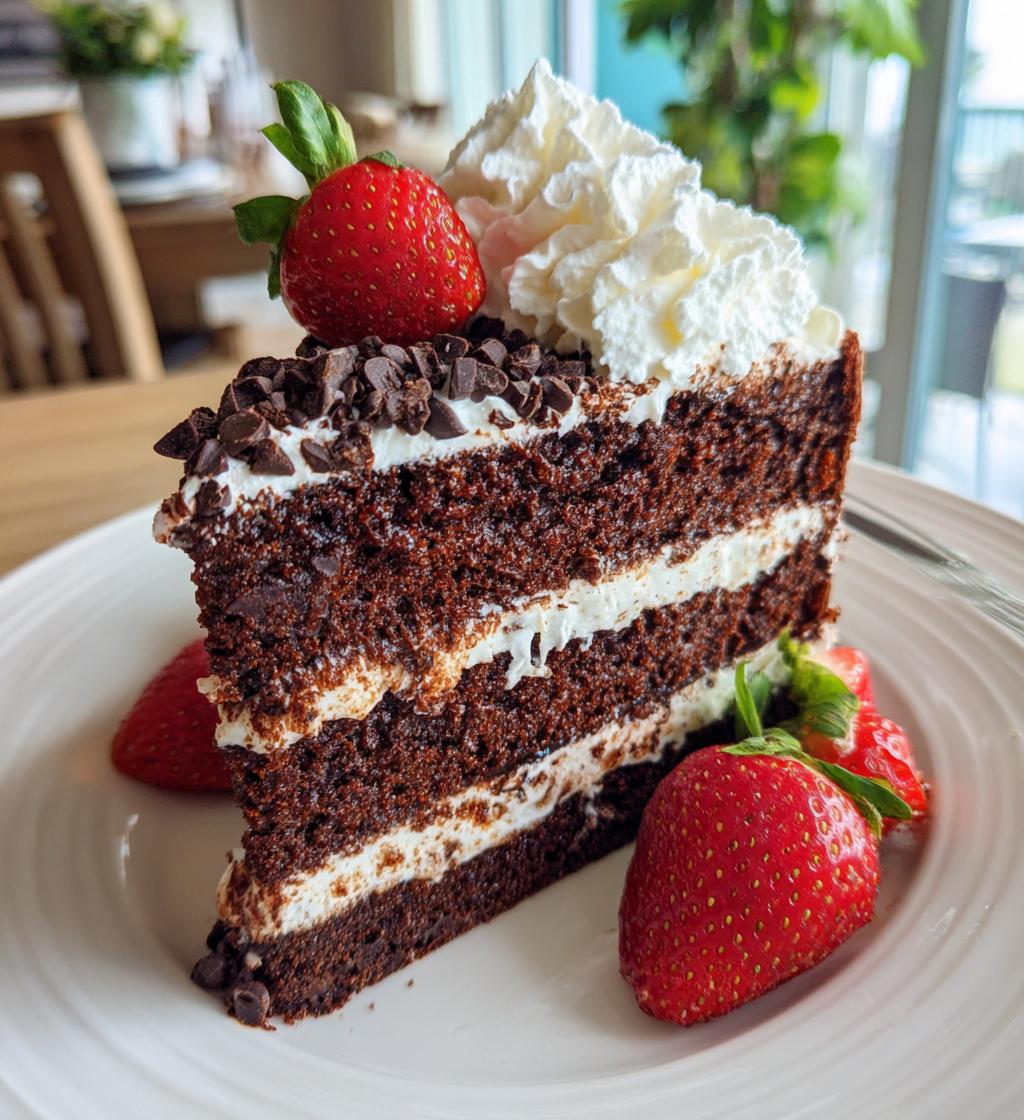
valentines day recipes: 7 Irresistible Treats to Cherish
Delicious recipes perfect for Valentine’s Day.
- Total Time: 50 minutes
- Yield: 12 servings 1x
Ingredients
- 2 cups of all-purpose flour
- 1 cup of sugar
- 1/2 cup of unsweetened cocoa powder
- 1 teaspoon of baking powder
- 1/2 teaspoon of salt
- 1 cup of milk
- 1/2 cup of vegetable oil
- 2 large eggs
- 1 teaspoon of vanilla extract
- 1 cup of chocolate chips
Instructions
- Preheat your oven to 350°F (175°C).
- In a bowl, mix flour, sugar, cocoa powder, baking powder, and salt.
- In another bowl, combine milk, oil, eggs, and vanilla.
- Pour the wet ingredients into the dry ingredients and mix until smooth.
- Fold in chocolate chips.
- Pour the batter into a greased baking pan.
- Bake for 30-35 minutes or until a toothpick comes out clean.
- Let it cool before serving.
Notes
- Serve with whipped cream or strawberries.
- Can be made a day in advance.
- Store in an airtight container.
- Prep Time: 15 minutes
- Cook Time: 35 minutes
- Category: Dessert
- Method: Baking
- Cuisine: American
- Diet: Vegetarian
Nutrition
- Serving Size: 1 piece
- Calories: 250
- Sugar: 20g
- Sodium: 200mg
- Fat: 10g
- Saturated Fat: 3g
- Unsaturated Fat: 5g
- Trans Fat: 0g
- Carbohydrates: 35g
- Fiber: 2g
- Protein: 4g
- Cholesterol: 30mg
Keywords: valentines day recipes