Valentine’s Day is a magical time filled with love, sweet surprises, and, of course, decadent desserts! There’s just something about this day that makes hearts flutter, and what better way to express your affection than with a homemade valentines day tart? This tart has become a cherished tradition in my home, and I can’t help but get excited every year when February rolls around. The rich, velvety chocolate pairs perfectly with the fresh strawberries, creating a treat that not only tastes divine but looks stunning on the table.
I remember the first time I made this tart for my partner; I was a bundle of nerves, hoping it would be a hit! As the aroma of chocolate filled the kitchen, I could hardly wait to see their reaction. And let me tell you, the look on their face when they took that first bite was priceless! It’s moments like these that make the effort worthwhile. So, whether you’re crafting this tart for a special someone or treating yourself, get ready to indulge in a dessert that’s as heartfelt as it is delicious. You won’t want to miss out on this delightful creation!
Why You’ll Love This Recipe
This valentines day tart is not only a feast for the eyes but also a delight for the taste buds! Here are a few reasons why this recipe will quickly become a favorite in your home:
- Effortless Preparation: With a pre-made tart shell, you can whip this dessert up in no time. Just a few simple steps and you’re on your way to impressing your loved ones!
- Rich Chocolate Flavor: The combination of dark chocolate and creamy filling creates a luxurious taste that’s perfect for celebrating love. Each bite melts in your mouth, leaving you craving more!
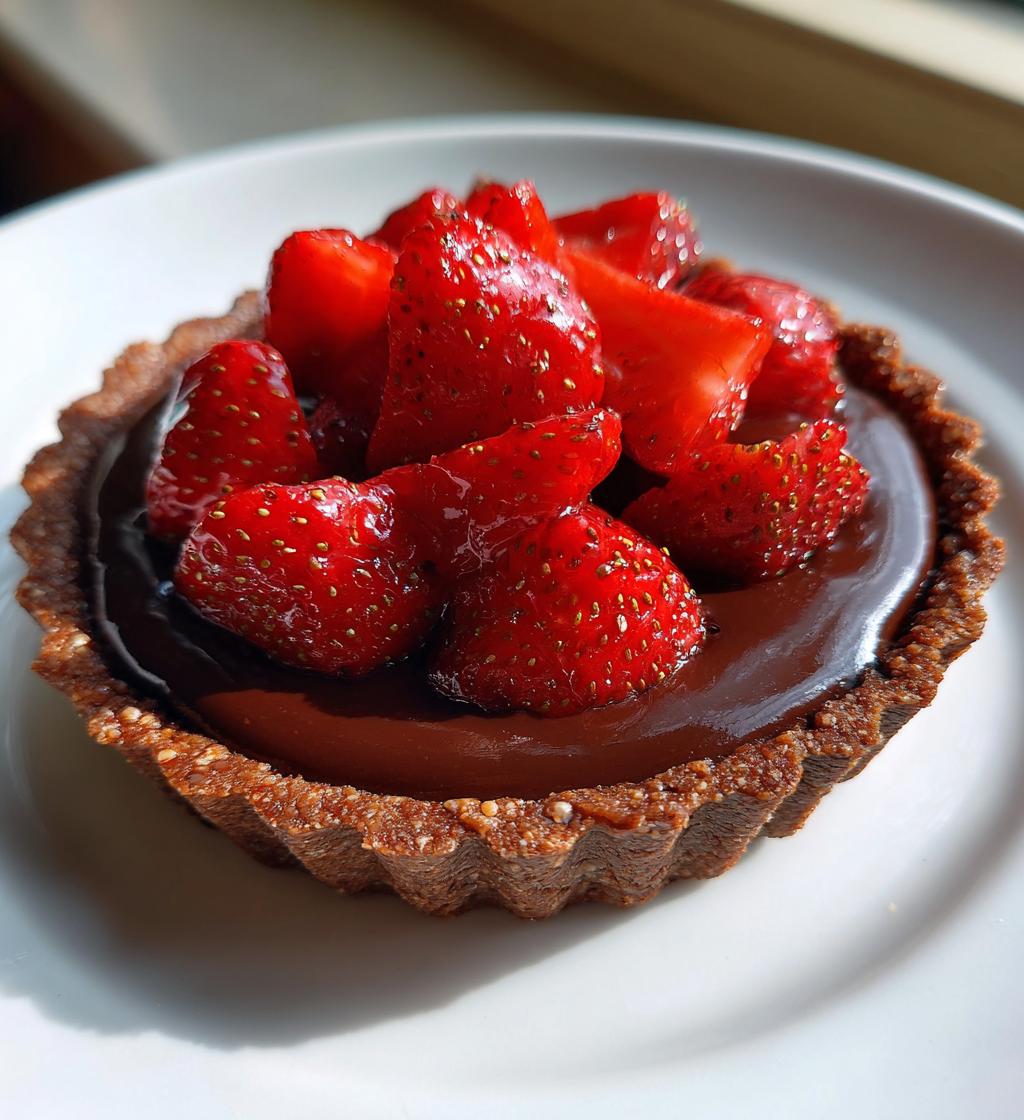
- Beautiful Presentation: Topping the tart with fresh strawberries not only adds a pop of color but also a burst of freshness that balances the richness of the chocolate. It’s a showstopper that looks as good as it tastes!
- Perfect for Sharing: This recipe yields eight generous servings, making it ideal for a romantic dinner or a cozy gathering with friends. Everyone will want a slice of this divine creation!
- Versatile and Customizable: Feel free to get creative! You can swap out the strawberries for raspberries or add a sprinkle of sea salt on top for an extra touch of sophistication.
Trust me, once you make this tart, you’ll be counting down the days until you can make it again for your next special occasion!
Ingredients for the Valentines Day Tart
Gathering the right ingredients is key to making this valentines day tart shine! Here’s what you’ll need to create this delightful dessert:
- 1 pre-made tart shell: This saves you time and gives you a perfectly shaped base.
- 200g dark chocolate: Go for high-quality chocolate for that rich, indulgent flavor.
- 100ml heavy cream: This adds creaminess to the filling, making it oh-so-smooth.
- 2 tablespoons sugar: Just enough sweetness to balance the dark chocolate.
- 1 teaspoon vanilla extract: A touch of vanilla enhances the overall flavor beautifully.
- Fresh strawberries for topping: These not only look gorgeous but add a fresh, fruity contrast to the chocolate.
With these ingredients in hand, you’re all set to create a tart that’s sure to impress!
How to Prepare the Valentines Day Tart
Ready to dive into the process of creating this decadent valentines day tart? It’s easier than you might think! Just follow these steps, and you’ll be well on your way to a chocolate masterpiece that’ll make hearts swoon.
Step 1: Preheat the Oven
First things first, let’s get that oven preheating to 350°F (175°C). Preheating is crucial because it ensures your tart bakes evenly from the get-go. You want that rich chocolate filling to set perfectly, and starting with a hot oven helps achieve just that!
Step 2: Melt the Chocolate
Next, it’s time to melt the dark chocolate. Grab a heatproof bowl and place it over a pot of simmering water—this method, known as a double boiler, gently melts the chocolate without burning it. Stir it occasionally until it’s completely smooth and glossy. Make sure you keep an eye on it; burnt chocolate is a bummer!
Step 3: Prepare the Cream Mixture
While the chocolate is melting, let’s prepare the cream mixture. In a separate saucepan, heat the heavy cream and sugar over medium heat. Stir gently until the sugar dissolves completely—this usually takes just a couple of minutes. You want the cream to be warm, but don’t let it boil. We want it to blend beautifully with the chocolate, not curdle!
Step 4: Combine Ingredients
Now that both your chocolate and cream are ready, it’s time to combine them! Carefully pour the warm cream mixture into the bowl of melted chocolate. Add the vanilla extract, and stir everything together until it’s well combined and smooth. This is where the magic happens—watch how the chocolate transforms into a luscious filling!
Step 5: Fill the Tart Shell
Grab your pre-made tart shell and pour the chocolate mixture right into it. Make sure it’s evenly distributed and fills the edges so every bite is packed with that rich chocolate goodness. It’s such a satisfying moment—you’re almost there!
Step 6: Bake the Tart
Place your tart in the preheated oven and bake for about 10-15 minutes. Keep an eye on it; you want the filling to be set but still slightly wobbly in the center. It’ll firm up as it cools, so don’t worry if it’s a bit soft at first.
Step 7: Cool and Top
Once your tart is done baking, remove it from the oven and let it cool at room temperature for about 30 minutes. Then, pop it in the fridge for at least an hour to chill and set completely. Finally, top with those beautiful fresh strawberries just before serving. They add that perfect touch of freshness and sweetness to balance the rich chocolate. Enjoy every delicious bite!
Tips for Success
To make sure your valentines day tart turns out perfectly every time, here are some tried-and-true tips that I’ve gathered along the way:
- Use High-Quality Chocolate: Trust me, using good chocolate makes a world of difference. Look for dark chocolate that’s at least 70% cocoa for that rich, deep flavor. It’s worth the splurge for a special occasion!
- Don’t Skip Chilling: After baking, be sure to let your tart cool to room temperature before chilling it in the fridge. This helps the filling set nicely and makes slicing easier. Plus, the flavors meld beautifully when it’s given time to chill!
- Mind the Baking Time: Keep a close eye on your tart as it bakes. Every oven is different! If it looks slightly jiggly in the center when you take it out, don’t worry—it will firm up as it cools.
- Add a Pinch of Salt: For an elevated flavor experience, consider sprinkling a tiny pinch of sea salt on top of the tart before serving. It enhances the chocolate’s sweetness and adds a delightful contrast.
- Decorate Just Before Serving: To keep the strawberries fresh and vibrant, add them right before you serve the tart. This ensures they look beautiful and taste their best!
With these tips in your back pocket, you’ll be well on your way to creating a stunning and delicious valentines day tart that will surely impress! Happy baking!
Nutritional Information
Here’s the estimated nutritional information for each slice of this delightful valentines day tart. Keep in mind that these values may vary based on specific ingredients and brands used, but this should give you a good idea of what to expect:
- Serving Size: 1 slice
- Calories: 250
- Fat: 15g
- Saturated Fat: 9g
- Unsaturated Fat: 6g
- Trans Fat: 0g
- Cholesterol: 20mg
- Sodium: 50mg
- Carbohydrates: 30g
- Fiber: 3g
- Sugar: 10g
- Protein: 3g
This tart is a lovely indulgence, perfect for special occasions. Enjoy it in moderation, and savor every delicious bite!
FAQ About the Valentines Day Tart
I know you might have a few questions about this delightful valentines day tart, so I’ve gathered some common inquiries and provided answers to help you out!
Can I use a different type of chocolate?
Absolutely! While dark chocolate gives this tart its rich flavor, you can experiment with milk chocolate or even white chocolate for a different twist. Just keep in mind that the sweetness level will change, so adjust the sugar accordingly to suit your taste!
How should I store leftovers?
If you happen to have any leftovers (which is rare, trust me!), you can store the tart covered in the refrigerator for up to three days. Just make sure to keep the fresh strawberries separate until you’re ready to serve to maintain their freshness!
Can I freeze the valentines day tart?
Yes, you can freeze the tart, but I recommend freezing it without the strawberries. Wrap it tightly in plastic wrap and then in aluminum foil. It should last about a month in the freezer. When you’re ready to enjoy it, let it thaw in the fridge overnight before serving!
What can I substitute for heavy cream?
If you’re looking for a lighter option or a dairy-free alternative, you can use coconut cream or a nut-based cream. Just keep in mind that this may alter the flavor slightly, but it will still be delicious!
Can I make this tart ahead of time?
Absolutely! This tart is perfect for making ahead of time. You can bake it a day in advance and chill it in the fridge until you’re ready to serve. Just add the strawberries right before serving for that fresh touch!
If you have more questions or need further tips, don’t hesitate to ask! Enjoy your baking adventure with this valentines day tart—it’s bound to be a hit!
Serving Suggestions
Now that you’ve crafted this stunning valentines day tart, it’s time to think about how to serve it up for maximum appeal! Here are a few delightful ideas that will elevate the experience and make every slice even more special:
- Whipped Cream Delight: A dollop of freshly whipped cream on the side is always a classic choice. You can sweeten it with a touch of vanilla or even a sprinkle of cocoa powder for an extra chocolatey kick!
- Ice Cream Indulgence: Serve a slice of tart with a scoop of vanilla or strawberry ice cream. The creamy texture of the ice cream perfectly complements the rich chocolate filling, making each bite an explosion of flavor.
- Chocolate Drizzle: For the true chocolate lovers out there, drizzle some melted chocolate over the top before serving. It adds a touch of elegance and gives a little extra chocolate goodness!
- Fresh Fruit Medley: Besides strawberries, consider serving with a medley of fresh fruits like raspberries, blueberries, or kiwi. The tartness of the berries contrasts beautifully with the sweet chocolate.
- Minty Freshness: Garnish your tart with a few fresh mint leaves. Not only does it add a pop of color, but the mint also provides a refreshing aftertaste that balances the richness of the chocolate.
These serving suggestions not only enhance the flavor but also make your valentines day tart look absolutely irresistible on your dessert table. Trust me, your guests will be raving about it long after the last slice is gone!
Print
Valentines Day Tart: 5 Indulgent Reasons to Bake It
A delicious tart perfect for Valentine’s Day.
- Total Time: 35 minutes
- Yield: 8 servings 1x
Ingredients
- 1 pre-made tart shell
- 200g dark chocolate
- 100ml heavy cream
- 2 tablespoons sugar
- 1 teaspoon vanilla extract
- Fresh strawberries for topping
Instructions
- Preheat the oven to 350°F (175°C).
- Melt the dark chocolate in a bowl over simmering water.
- In a separate bowl, heat the cream and sugar until sugar dissolves.
- Combine melted chocolate with cream mixture and add vanilla extract.
- Pour the chocolate mixture into the tart shell.
- Bake for 10-15 minutes until set.
- Let cool and top with fresh strawberries.
Notes
- Use high-quality chocolate for better flavor.
- Chill the tart for at least an hour before serving.
- Prep Time: 20 minutes
- Cook Time: 15 minutes
- Category: Dessert
- Method: Baking
- Cuisine: French
- Diet: Vegetarian
Nutrition
- Serving Size: 1 slice
- Calories: 250
- Sugar: 10g
- Sodium: 50mg
- Fat: 15g
- Saturated Fat: 9g
- Unsaturated Fat: 6g
- Trans Fat: 0g
- Carbohydrates: 30g
- Fiber: 3g
- Protein: 3g
- Cholesterol: 20mg
Keywords: valentines day tart, chocolate tart, dessert recipe