
Have you ever dreamed of enjoying warm, homemade bread without spending hours in the kitchen? Well, let me tell you, air fryer bread recipes are a game changer! These quick and easy recipes allow you to whip up a delicious loaf in no time. Yes, you heard me right—no kneading for ages or waiting around for dough to rise. Just a handful of simple ingredients and your trusty air fryer, and you’ll have fresh bread that’ll make your home smell heavenly.
Imagine slicing into a golden-brown loaf, the crust perfectly crisp, and the inside soft and fluffy. It’s the kind of comfort that makes any meal special. Plus, I love how versatile these air fryer bread recipes can be; whether you want to make a classic white loaf or add herbs for a gourmet twist, the possibilities are endless! Trust me, once you try this, you’ll never want to go back to store-bought again!
Ingredients List
Getting the right ingredients is crucial for making the best air fryer bread. Here’s what you’ll need:
- 2 cups all-purpose flour, sifted
- 1 cup warm water (about 110°F or 43°C)
- 2 teaspoons sugar (to help activate the yeast)
- 1 teaspoon salt (for flavor)
- 1 tablespoon olive oil (for richness)
- 1 packet active dry yeast (2 1/4 teaspoons, make sure it’s fresh!)
Feel free to experiment with the flour—if you’re feeling adventurous, try using bread flour for a chewier texture or even whole wheat for a nuttier flavor. The key is to keep it simple and fresh, and trust me, this combination will yield a delightful loaf every time!
How to Prepare Air Fryer Bread Recipes
Now that you’ve got your ingredients ready, let’s dive into the steps to create your air fryer bread masterpiece! I promise it’s easier than you think, and each step is crucial for getting that perfect loaf.
Step 1: Activate the Yeast
First things first, you need to wake up that yeast! In a bowl, mix the warm water (it should feel like a cozy bath) with the sugar and active dry yeast. Give it a gentle stir and let it sit for about 5 minutes. You’ll notice it getting frothy, which means the yeast is alive and ready to work its magic! This step is super important because it ensures your bread will rise beautifully.
Step 2: Combine Dry Ingredients
Once your yeast mixture is bubbly, it’s time to add the rest of the dry ingredients. In the same bowl, add the sifted flour, salt, and olive oil. Stir everything together until it starts to form a dough. Don’t worry if it looks a little shaggy at first; that’s a good sign you’re on the right track!
Step 3: Knead the Dough
Now comes the fun part—kneading! Transfer your dough to a lightly floured surface and knead it for about 5 minutes. You want it to be smooth and elastic, like a soft pillow. If it’s too sticky, sprinkle a little more flour as needed. Trust me, you’ll know it’s ready when it springs back after you poke it—a satisfying little bounce!
Step 4: Let the Dough Rise
After kneading, place your dough in a lightly greased bowl and cover it with a clean kitchen towel. Let it rise in a warm spot for about 1 hour. This is where the magic happens! The dough will double in size, creating those lovely air pockets that make your bread light and fluffy.
Step 5: Preheat the Air Fryer
While the dough is rising, go ahead and preheat your air fryer to 320°F (160°C). Preheating is crucial because it ensures even cooking right from the start. You want that perfect crust to form as soon as the dough hits the basket!
Step 6: Shape and Cook the Bread
Once your dough has risen, gently punch it down to release some gas. Shape it into a loaf or whatever shape you fancy, and place it in the air fryer basket. Cook it for about 15-20 minutes until it’s golden brown and your kitchen smells like heaven. Keep an eye on it, as every air fryer can be a little different.
Step 7: Cool and Slice
After baking, resist the urge to slice right away! Allow the bread to cool for at least 10 minutes before slicing. This helps it set and keeps it from getting gummy. Trust me, the wait is worth it when you finally take that first bite of warm, homemade bread!
Why You’ll Love This Recipe
This air fryer bread recipe is a total game changer in the kitchen! Here’s why you’re going to fall head over heels for it:
- Quick to Make: From start to finish, you can have fresh bread in under two hours—perfect for those last-minute cravings or surprise guests!
- Easy Cleanup: No messy mixing bowls or complicated gadgets; just one bowl and your air fryer! I love how simple it is to whip up this bread without a mountain of dishes to tackle afterward.
- Homemade Taste: There’s nothing quite like the aroma of warm bread wafting through your home. This recipe gives you that comforting, homemade flavor without the fuss of traditional baking.
- Versatile Uses: Whether you want to make a classic sandwich, serve it with soups or salads, or enjoy it with a spread of butter, this bread is incredibly versatile. You can even jazz it up with herbs or spices to match your meal!
- Healthier Option: You control the ingredients! This means you can avoid preservatives and additives found in store-bought bread, making it a healthier choice for your family.
Honestly, once you try this recipe, you’ll wonder how you ever lived without it! Trust me—your taste buds will thank you!
Tips for Success
Getting the perfect loaf of air fryer bread is all about the details! Here are my top tips to ensure that your bread turns out delicious every single time:
- Quality Ingredients: Always use fresh ingredients! Make sure your yeast is within its expiration date, or you might end up with a flat loaf. I like to check the yeast by mixing it in warm water with sugar and waiting for it to bubble—if it doesn’t, toss it out and grab a new packet!
- Perfect Kneading: When kneading the dough, don’t rush it! Aim for about 5 minutes of kneading until it’s smooth and elastic. You want to develop the gluten, which gives the bread its structure. If the dough feels sticky, dust your hands and the surface with a little flour, but don’t go overboard—too much flour can make the bread dense.
- Temperature Matters: Be mindful of your kitchen temperature when letting the dough rise. A warm, draft-free place is ideal! If your kitchen is cool, try placing the bowl in the oven (turned off) with the light on to create a cozy environment. This will help the dough rise nicely.
- Air Fryer Settings: Every air fryer is a bit different, so keep an eye on your bread as it cooks. If it’s browning too quickly, cover it loosely with aluminum foil to prevent burning while it finishes cooking. I’ve learned this the hard way, so trust me—it’s a handy trick!
- Don’t Skip the Cooling: Patience is key! Allow the bread to cool for at least 10 minutes before slicing. This helps the crumb set up nicely and prevents it from becoming gummy. The aroma while it cools is pure torture, but your taste buds will appreciate the wait!
With these tips in your back pocket, you’ll be ready to master air fryer bread recipes like a pro! Happy baking!
Nutritional Information
Let’s talk about what makes this air fryer bread not just delicious, but also a decent addition to your meals! Here’s an estimated breakdown of the nutritional values based on the ingredients used. Keep in mind, these figures are approximate and can vary depending on the specific brands or variations of ingredients you choose:
- Calories: 150 per slice
- Fat: 3g
- Saturated Fat: 0.5g
- Unsaturated Fat: 2.5g
- Trans Fat: 0g
- Cholesterol: 0mg
- Sodium: 200mg
- Carbohydrates: 28g
- Fiber: 1g
- Protein: 4g
- Sugar: 1g
These numbers show that you can enjoy a slice of homemade goodness without too much guilt! Whether you’re pairing it with a hearty soup or using it for sandwiches, knowing the nutritional info helps you make choices that fit your diet. Just remember, the best part about homemade bread is that you know exactly what’s in it, making it a wholesome addition to any meal!
FAQ Section
Can I use whole wheat flour?
Absolutely! You can substitute whole wheat flour for the all-purpose flour in this recipe. Just keep in mind that whole wheat flour tends to absorb more liquid, so you might need to add a bit more warm water to get the right dough consistency. The bread will have a denser texture and a nuttier flavor, which can be a delightful twist on the classic recipe!
How do I store leftover bread?
To keep your air fryer bread fresh, store it in an airtight container at room temperature. If you anticipate not finishing the loaf within a couple of days, consider slicing it and freezing the slices in a zip-top bag. When you’re ready to enjoy, just pop a slice in the toaster or let it thaw at room temperature for a quick snack!
Can I add flavors to the dough?
Oh, definitely! This recipe is super versatile. You can add herbs like rosemary or thyme for a savory touch, or even mix in some garlic powder for an extra kick. If you want a sweeter loaf, consider adding a teaspoon of cinnamon or even some dried fruits like raisins or cranberries. The possibilities are endless, and it’s a fun way to personalize your bread!
What should I do if my dough doesn’t rise?
If your dough isn’t rising, it could be due to the yeast. Make sure you’re using fresh yeast—old or expired yeast won’t activate properly. Also, pay attention to the water temperature; if it’s too hot, it can kill the yeast. If the dough isn’t rising, try moving it to a warmer spot for a little while. Sometimes, a little extra patience is all it needs!
Can I double the recipe?
You can definitely double this recipe for a larger batch! Just remember to adjust the cooking time a bit if you’re using a larger loaf or multiple smaller ones in the air fryer. Keep an eye on them as they cook, and test for doneness by looking for that golden brown color and springy texture. Enjoy sharing the deliciousness!
Serving Suggestions
Now that you’ve baked this delightful air fryer bread, it’s time to think about how to enjoy it! This bread is incredibly versatile and pairs beautifully with a variety of dishes. Here are some of my favorite serving suggestions:
- Heartwarming Soups: There’s nothing quite like a warm bowl of soup alongside fresh bread. Try serving it with a creamy tomato basil soup or a hearty vegetable stew. The bread is perfect for dipping, soaking up all those flavorful juices!
- Fresh Salads: A light, crisp salad makes for a wonderful complement to your freshly baked bread. I love serving it with a classic Caesar salad or a refreshing Greek salad. You can even use the bread to make croutons for an extra crunch!
- Sandwich Base: This bread is fantastic for sandwiches! Whether you’re crafting a classic BLT, turkey and avocado, or a veggie delight, the soft, fluffy texture holds up beautifully. It’s a great way to elevate your lunch game!
- Breakfast Toast: Don’t forget about breakfast! Toast slices of this bread and top them with butter, jam, or even avocado and poached eggs for a delicious start to your day. Trust me, it’ll make your mornings feel special!
- Cheese and Charcuterie Boards: If you’re hosting friends or family, slice up your bread and serve it on a charcuterie board with an assortment of cheeses, cured meats, olives, and fresh fruits. It adds a homemade touch that everyone will appreciate!
With these serving ideas, you can enjoy your air fryer bread in so many delicious ways. Get creative and have fun pairing it with your favorite dishes! Happy eating!
Print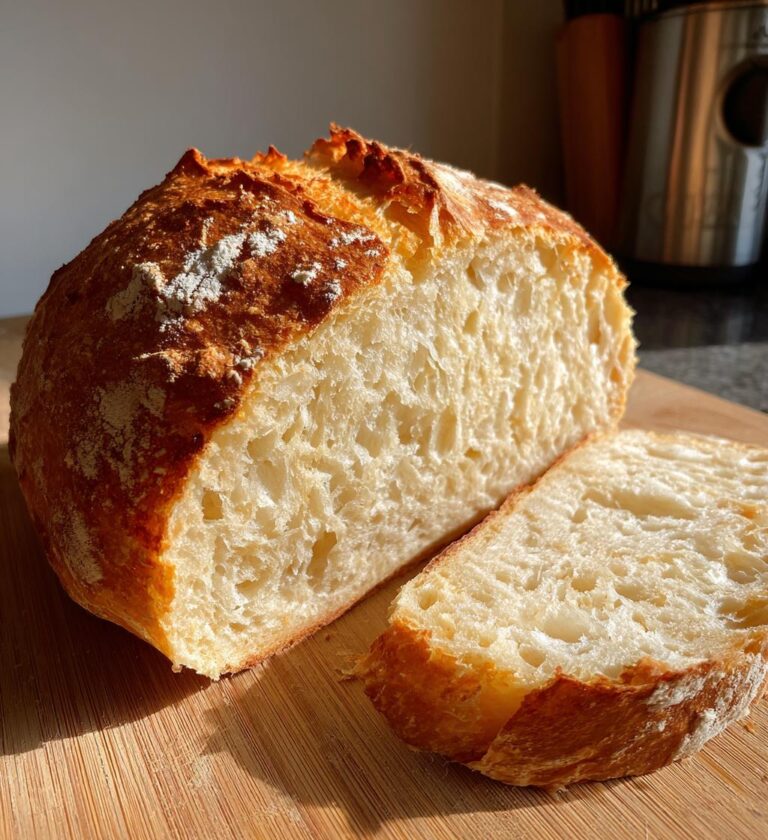
Air Fryer Bread Recipes: 7 Simple Ways to Delight Your Taste
Easy and quick air fryer bread recipes for delicious homemade bread.
- Total Time: 1 hour 35 minutes
- Yield: 1 loaf 1x
Ingredients
- 2 cups all-purpose flour
- 1 cup warm water
- 2 teaspoons sugar
- 1 teaspoon salt
- 1 tablespoon olive oil
- 1 packet active dry yeast (2 1/4 teaspoons)
Instructions
- In a bowl, mix warm water, sugar, and yeast. Let it sit for 5 minutes.
- Add flour, salt, and olive oil to the yeast mixture.
- Knead the dough for about 5 minutes until smooth.
- Let the dough rise in a warm place for 1 hour.
- Preheat your air fryer to 320°F (160°C).
- Shape the dough and place it in the air fryer basket.
- Cook for 15-20 minutes until golden brown.
- Let it cool before slicing.
Notes
- Use bread flour for a chewier texture.
- Experiment with herbs for added flavor.
- Store leftover bread in an airtight container.
- Prep Time: 15 minutes
- Cook Time: 20 minutes
- Category: Bread
- Method: Air Frying
- Cuisine: American
- Diet: Vegetarian
Nutrition
- Serving Size: 1 slice
- Calories: 150
- Sugar: 1g
- Sodium: 200mg
- Fat: 3g
- Saturated Fat: 0.5g
- Unsaturated Fat: 2.5g
- Trans Fat: 0g
- Carbohydrates: 28g
- Fiber: 1g
- Protein: 4g
- Cholesterol: 0mg
Keywords: air fryer bread recipes