
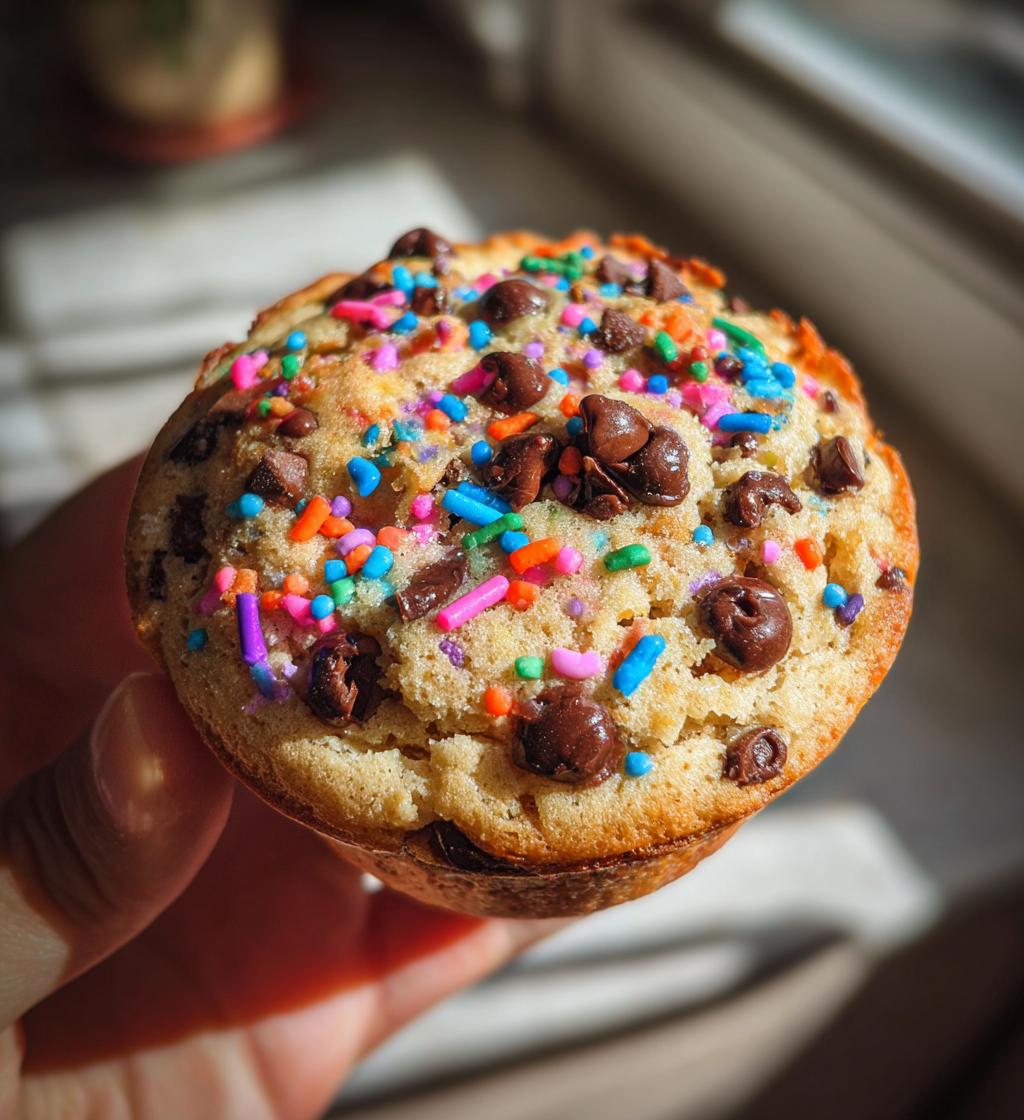
Ah, Valentine’s Day! It’s that special time of year when love is in the air, and I can’t help but get excited about baking delightful treats for my loved ones. There’s something magical about whipping up sweet goodies that bring smiles and warmth to the hearts of those we care about. Whether it’s for friends, family, or that special someone, sharing homemade treats is a beautiful way to express love. Trust me, nothing says “I care” like a batch of freshly baked goodies made with love. So, let’s dive into this fun Valentine’s baking adventure together, shall we?
Ingredients for Valentine’s Baking
Gathering the right ingredients is key to creating those lovely Valentine’s treats! Here’s what you’ll need:
- 2 cups all-purpose flour – this will be the base of your delicious dessert.
- 1 cup sugar – for that perfect touch of sweetness.
- 1/2 cup butter, softened – make sure it’s at room temperature for easy creaming.
- 1 cup milk – this adds moisture and richness to the batter.
- 2 eggs – they’ll help bind everything together beautifully.
- 1 tsp vanilla extract – the secret to that warm, comforting flavor.
- 1 tbsp baking powder – to give your treats a lovely rise.
- 1/2 cup chocolate chips – because who can resist a little chocolate?
- 1/4 cup sprinkles – for that festive Valentine’s touch!
With these ingredients, you’re all set to create something truly special!
How to Prepare for Valentine’s Baking
Now that you’ve gathered all your ingredients, let’s get started on making those delightful Valentine’s treats! Follow these steps closely, and you’ll have a delicious dessert that’s sure to impress.
Preheat the Oven
First things first, let’s preheat that oven! You’ll want to set it to 350°F (175°C). Preheating is super important because it helps the cake rise evenly and ensures that it bakes properly. So, while you’re mixing your batter, the oven will be ready to go when you are!
Creaming Butter and Sugar
Next up is creaming the butter and sugar. In a large mixing bowl, add your softened butter and sugar, then use a hand mixer or a sturdy wooden spoon to beat them together until the mixture is light and fluffy. This step is crucial because it creates air pockets that give your treats that lovely, tender texture we all adore. Take your time here; it’s worth it!
Adding Eggs and Vanilla
Once your butter and sugar are creamed, it’s time to add the eggs. Crack each egg in one at a time, mixing well after each addition. This helps incorporate them evenly into the batter. Don’t forget to add that teaspoon of vanilla extract as well! Vanilla brings warmth and depth to the flavor, making your treats extra special.
Mixing Dry Ingredients
Now, let’s tackle the dry ingredients. In a separate bowl, whisk together your flour and baking powder. This step is important to ensure the baking powder is evenly distributed throughout the flour, which helps your treats rise beautifully. Once combined, set it aside for a moment.
Combining Wet and Dry Mixtures
Here comes the fun part! Gradually add the dry mixture to your wet ingredients, alternating with the milk. Start by adding a bit of the flour mixture, mix gently, then pour in some milk, and continue this pattern until everything is combined. This technique prevents overmixing and keeps your batter smooth and lump-free!
Baking the Treats
Finally, pour the batter into a greased baking dish. Don’t be shy—make sure it’s evenly spread out. Now for the fun part—sprinkle those colorful sprinkles on top! They add a festive touch that’s perfect for Valentine’s Day. Bake in your preheated oven for about 30-35 minutes or until a toothpick comes out clean. Trust me, the aroma that fills your kitchen will have everyone rushing to the oven!
Nutritional Information Disclaimer
As with any delightful recipe, the nutritional information for these Valentine’s treats can vary based on the specific ingredients and brands you choose. While I strive to provide accurate estimates, please keep in mind that precise values may not be available. It’s always a good idea to check the labels on your ingredients for the most accurate information. Happy baking, and enjoy those sweet moments with loved ones!
Why You’ll Love This Recipe
- Quick Preparation: You can whip up this recipe in no time! With just 15 minutes of prep and about 35 minutes of baking, you’ll have delicious treats ready to share in under an hour.
- Delightful Taste: The combination of rich chocolate chips, sweet sprinkles, and a hint of vanilla makes these treats irresistible. Every bite is a burst of joy that your loved ones will cherish.
- Perfect for Sharing: These goodies are not just for you! They’re ideal for gifting to friends, family, or that special someone. Nothing says “I care” like a batch of homemade treats!
- Customizable: Feel free to get creative! You can easily swap out chocolate chips for nuts, dried fruit, or even add your favorite flavor extracts to make them uniquely yours.
- Festive Appeal: The colorful sprinkles give these treats a charming, festive look, making them perfect for Valentine’s Day celebrations or any occasion that calls for a little sweetness.
Tips for Success in Valentine’s Baking
To ensure your Valentine’s treats turn out perfectly, I’ve gathered some tried-and-true tips that’ll help you avoid common mistakes. Trust me, a little bit of extra care can take your baking to the next level!
Use Room Temperature Ingredients
Make sure your butter and eggs are at room temperature before you start mixing. This helps them blend more easily and creates a smoother batter. If you forget to set them out, don’t worry! You can warm your eggs gently in a bowl of warm water for about 10 minutes, and microwave the butter in short bursts until it’s soft but not melted.
Measure Ingredients Accurately
Accurate measurements are crucial for baking success! Use dry measuring cups for flour and sugar, and liquid measuring cups for milk. Spoon flour into your measuring cup and level it off with a knife instead of scooping directly from the bag. This prevents packing, which could lead to a dry outcome.
Don’t Overmix the Batter
It’s tempting to keep mixing until everything is perfectly smooth, but overmixing can lead to dense, tough treats. Mix just until the ingredients are combined, and you’ll be rewarded with a light, fluffy texture. A few small lumps are perfectly fine!
Check for Doneness Early
Ovens can vary, so start checking your treats a few minutes before the recommended baking time. Insert a toothpick into the center; it should come out clean or with a few moist crumbs. If it’s wet with batter, give it a few more minutes. This way, you’ll avoid overbaking and drying them out!
Let Them Cool Properly
Once your treats are out of the oven, resist the urge to dig in right away! Let them cool in the pan for about 10-15 minutes before transferring to a wire rack. This allows them to set properly and makes them easier to handle without falling apart.
By keeping these tips in mind, you’ll set yourself up for a delightful Valentine’s baking experience that results in treats everyone will love! Happy baking!
Variations on Valentine’s Baking
Now that you’ve got the basic recipe down, let’s talk about how to add a personal touch to your Valentine’s baking! Trust me, the possibilities are endless, and a few simple tweaks can transform your treats into something even more special.
Mix-Ins Galore
Feeling adventurous? Consider adding some delightful mix-ins! Instead of chocolate chips, try incorporating:
- Nuts: Chopped walnuts or pecans add a lovely crunch and flavor.
- Dried Fruit: Cranberries or cherries lend a sweet-tart surprise that pairs beautifully with the sweetness of the treats.
- White Chocolate Chips: For a creamy twist, swap out regular chocolate chips for white chocolate. It adds a touch of elegance!
Flavor Infusions
Why not experiment with different flavor extracts? If you want to switch things up, consider these options:
- Almond Extract: A teaspoon of almond extract gives your treats a lovely nutty flavor that’s oh-so-delicious.
- Coconut Extract: Add a tropical flair with coconut extract for a sweet, island-inspired treat.
- Mint Extract: A hint of peppermint can give your baked goods a refreshing twist, perfect for Valentine’s Day!
Frosting and Toppings
Taking your treats to the next level is as easy as adding frosting or toppings! Here are a few ideas:
- Chocolate Ganache: Pour a luscious layer of chocolate ganache over the top for an indulgent finish that’s hard to resist.
- Buttercream Frosting: Whip up a batch of fluffy buttercream and pipe it on top for a classic touch. You can tint it pink or red for a festive look!
- Fruit Toppings: Fresh strawberries or raspberries on top not only look gorgeous but also add a fresh burst of flavor.
Creative Shapes
Finally, consider changing the shape of your treats! Instead of a traditional baking dish, pour the batter into heart-shaped molds or cookie cutters for fun, festive shapes. These little details make your Valentine’s treats even more special!
With these easy variations, you can customize your Valentine’s baking to suit your taste and impress your loved ones even more. So go ahead, get creative, and let your imagination run wild in the kitchen!
Serving Suggestions for Valentine’s Treats
Now that you’ve baked up a batch of these delightful Valentine’s treats, let’s talk about how to serve them to really impress your loved ones! The right accompaniments can elevate your baked goods from delicious to unforgettable.
Pair with Ice Cream
One of my absolute favorite ways to enjoy these treats is to serve them warm with a scoop of vanilla ice cream on the side. The creamy, cold ice cream perfectly complements the soft, warm cake, creating a heavenly contrast that’s hard to resist. You can even drizzle a bit of chocolate or caramel sauce on top for an extra touch of indulgence!
Enjoy with Coffee or Tea
For a cozy afternoon treat, pair your baked goodies with a steaming cup of coffee or tea. The rich flavors of a well-brewed coffee enhance the sweetness of the treats beautifully. If you’re feeling fancy, try a flavored coffee, like hazelnut or mocha, to add another layer of deliciousness. And if you prefer tea, a nice chai or herbal blend brings a lovely warmth that matches perfectly!
Serve with Fresh Berries
Adding a side of fresh berries not only makes for a gorgeous presentation but also adds a refreshing burst of flavor. Strawberries, raspberries, or blueberries complement the sweetness of your treats while providing a nice balance. You could even toss them with a sprinkle of sugar for a little extra sweetness!
Drizzle with Glaze or Icing
If you’re looking to take your treats up a notch, consider drizzling them with a simple glaze or icing. A light lemon glaze, made with powdered sugar and fresh lemon juice, adds a zesty touch that pairs beautifully with the rich flavors of chocolate and vanilla. Or, you can whip up a quick cream cheese icing for a rich, luscious topping!
Create a Dessert Platter
Finally, why not make a beautiful dessert platter? Arrange your Valentine’s treats alongside other sweet bites like cookies, brownies, and fruit. This not only looks stunning but also gives everyone a variety of flavors to enjoy. It’s perfect for parties or romantic dinners at home!
With these serving suggestions, you’ll create a delightful experience that makes your Valentine’s Day baking even more special. Enjoy the love and sweetness you’ve whipped up in the kitchen!
Storage & Reheating Instructions
After all that hard work baking your delightful Valentine’s treats, you might have some leftovers! Here’s how to store them properly so they stay fresh and delicious for days to come.
Storing Your Treats
Once your treats have cooled completely, transfer them to an airtight container. This is key to keeping them moist and flavorful. You can also wrap each piece individually in plastic wrap for added freshness, especially if you plan on sharing some later! Store the container in a cool, dry place, and your treats should last for about 3-5 days.
Freezing for Later
If you want to save some for a later date, these treats freeze beautifully! Just make sure they’re fully cooled before you freeze them. Wrap each piece tightly in plastic wrap, then place them in a freezer-safe bag or container. They can stay in the freezer for up to 3 months. When you’re ready to enjoy them, simply thaw them in the fridge overnight or at room temperature for a couple of hours.
Reheating Instructions
To enjoy your treats warm, which I highly recommend, preheat your oven to 350°F (175°C). Place the treats on a baking sheet and cover them loosely with aluminum foil to prevent over-browning. Heat for about 10-15 minutes, or until warmed through. You can also pop them in the microwave for about 10-15 seconds, but be careful not to overdo it, or they might get a bit tough.
By following these simple storage and reheating instructions, you’ll ensure that your Valentine’s treats stay just as tasty as the day you baked them. Enjoy every sweet moment!
Print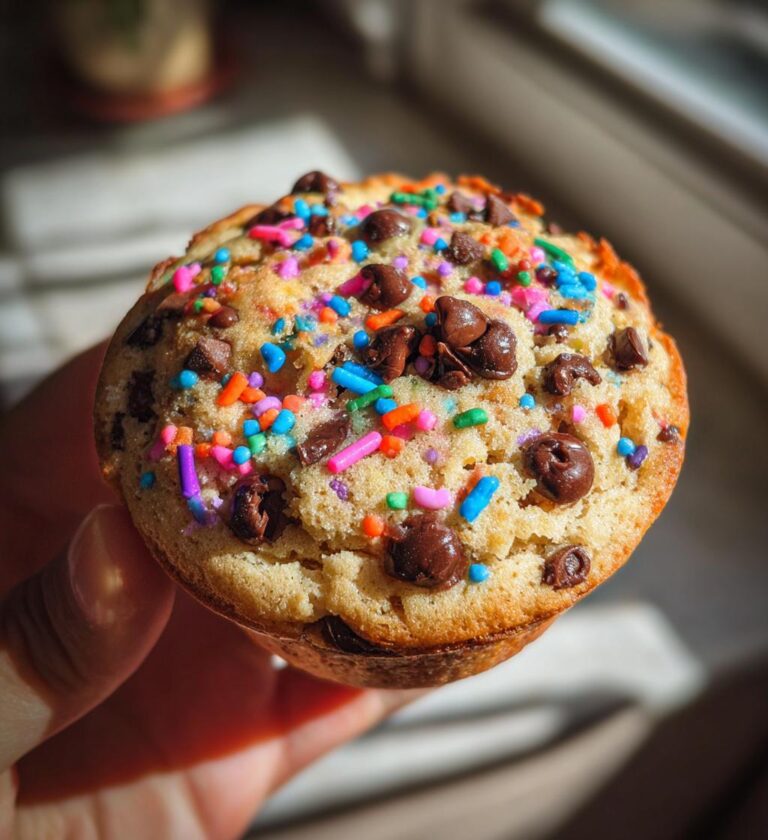
Valentines baking: 7 Sweet Treats to Delight Your Loved Ones
A delightful recipe for Valentine’s Day treats that you can bake at home.
- Total Time: 50 minutes
- Yield: 12 servings 1x
Ingredients
- 2 cups all-purpose flour
- 1 cup sugar
- 1/2 cup butter, softened
- 1 cup milk
- 2 eggs
- 1 tsp vanilla extract
- 1 tbsp baking powder
- 1/2 cup chocolate chips
- 1/4 cup sprinkles
Instructions
- Preheat your oven to 350°F (175°C).
- In a bowl, cream butter and sugar until light.
- Add eggs one at a time, mixing well.
- Stir in vanilla extract.
- In another bowl, combine flour and baking powder.
- Gradually add the dry ingredients to the wet mixture.
- Fold in milk and chocolate chips.
- Pour batter into a greased baking dish.
- Sprinkle with colorful sprinkles.
- Bake for 30-35 minutes or until a toothpick comes out clean.
Notes
- Let the treats cool before .
- Store in an airtight container.
- Can be decorated with icing for extra flair.
- Prep Time: 15 minutes
- Cook Time: 35 minutes
- Category: Dessert
- Method: Baking
- Cuisine: American
- Diet: Vegetarian
Nutrition
- Serving Size: 1 piece
- Calories: 200
- Sugar: 10g
- Sodium: 150mg
- Fat: 8g
- Saturated Fat: 5g
- Unsaturated Fat: 2g
- Trans Fat: 0g
- Carbohydrates: 30g
- Fiber: 1g
- Protein: 3g
- Cholesterol: 30mg
Keywords: valentines baking, valentine treats, baking recipes