
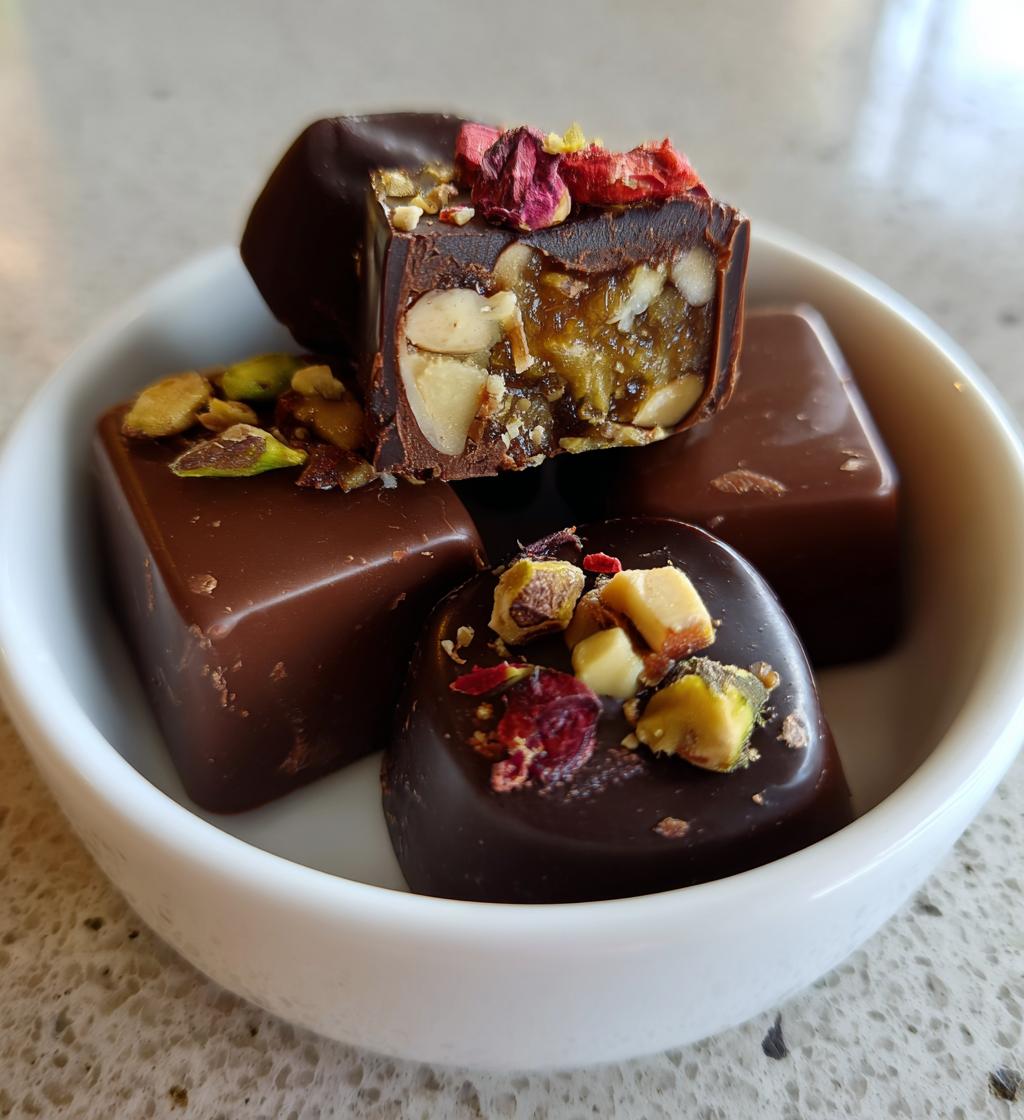
There’s something truly magical about making your own valentines day chocolates. I mean, who doesn’t get a warm fuzzy feeling when they unwrap a beautifully crafted chocolate, knowing it was made with love? This delightful process isn’t just about satisfying a sweet tooth; it’s a heartfelt way to show someone you care. Whether you’re crafting them for a partner, friend, or even yourself, these homemade treats have a special charm that store-bought chocolates just can’t match.
What I love most is how simple and fun it is to whip up these chocolates in your own kitchen. You don’t need to be a master chocolatier! Just gather a few ingredients, and you’re ready to go. The best part? You can customize them however you like! Add your favorite nuts, sprinkle in some dried fruits, or go all out with colorful toppings. It’s like creating little pieces of art that you can eat!
So, let’s dive into this sweet adventure together! You’ll be amazed at how quickly you can create a batch of delicious chocolates that are perfect for sharing or indulging in all by yourself. Trust me, your taste buds will thank you, and the joy of gifting these homemade delights will light up anyone’s Valentine’s Day!
Ingredients List
Before we dive into the delicious process, let’s gather all the goodies you’ll need to make these irresistible valentines day chocolates. Here’s what you’ll need:
- 200g dark chocolate, chopped into small pieces
- 100g milk chocolate, chopped
- 50g butter
- 1/2 cup heavy cream
- 1 tsp vanilla extract
- 1/2 cup assorted nuts, roughly chopped (feel free to mix and match your favorites!)
- 1/2 cup dried fruits, diced (think cranberries, apricots, or whatever you love)
Make sure to use high-quality chocolate for the best flavor—trust me, it makes a world of difference! Now that we have our ingredients ready, let’s get to the fun part of making these chocolates!
How to Prepare Valentines Day Chocolates
Ready to embark on a delightful chocolate-making journey? This part is the most exciting! Let’s break it down into easy-to-follow steps so you can whip up your own valentines day chocolates in no time. Grab your apron and let’s get started!
Step-by-Step Instructions
- Chop the chocolate: Start by chopping the dark and milk chocolate into small pieces. The smaller the pieces, the easier they’ll melt. You want them to be uniform in size, so they melt evenly!
- Melt the butter and cream: In a saucepan, melt the butter and heavy cream over low heat. Keep an eye on it, stirring gently until everything is nicely combined and smooth. This helps to bring out the rich flavors.
- Add the chocolate: Once your butter and cream mixture is melted, remove the saucepan from the heat. Add the chopped chocolate and stir it until it’s completely smooth. This is where the magic happens, so don’t rush it—take your time!
- Mix in the vanilla: Now, stir in the vanilla extract. This step adds a lovely depth of flavor that’ll make your chocolates even more irresistible. Trust me, it’s worth it!
- Pour into molds: Carefully pour the chocolate mixture into your molds. You can use silicone molds, heart-shaped ones for Valentine’s Day, or even a simple baking tray for later. Just make sure not to overfill them.
- Add the toppings: Before the chocolate sets, sprinkle your chopped nuts and diced dried fruits on top. Get creative here! You can mix and match as you please, ensuring every piece has a bit of that added crunch and sweetness.
- Chill to perfection: Place your molds in the refrigerator and chill for about 2 hours. This step is crucial as it helps the chocolates firm up beautifully. Don’t be tempted to rush this part; patience is key!
- Unmold and serve: Once the chocolates are firm, gently remove them from the molds. They should pop out easily if you’ve used silicone. Now, you’re ready to share (or not) these delightful treats!
And there you have it! Follow these steps, and you’ll create a batch of homemade valentines day chocolates that are sure to impress. Just remember, the best part is enjoying them, whether you’re treating yourself or gifting them to someone special!
Why You’ll Love This Recipe
Seriously, there are so many reasons to adore this valentines day chocolates recipe! Here are just a few that’ll have you rushing to your kitchen:
- Quick and Easy: You can whip up these chocolates in no time—just about 30 minutes of active prep. Perfect for when you need a last-minute gift or craving something sweet!
- Customizable: The sky’s the limit! You can mix in your favorite nuts, dried fruits, or even a sprinkle of sea salt for that sweet-and-salty combo. Make each batch uniquely yours!
- Delicious Flavor: The rich blend of dark and milk chocolate, combined with creamy butter and a hint of vanilla, creates a flavor explosion that’s hard to resist. Each bite is pure indulgence!
- No-Bake Fun: You don’t need an oven for this recipe, which means less fuss and mess. Just melt, mix, and chill—easy peasy!
- Perfect for Sharing: These chocolates make an adorable gift for loved ones. Whether it’s for your partner, friends, or family, everyone will appreciate the heartfelt gesture of homemade treats.
- Great for Any Occasion: While they’re perfect for Valentine’s Day, these chocolates are versatile enough to enjoy any time of year! Birthdays, anniversaries, or just because—there’s always a reason to indulge!
Trust me, once you try making these valentines day chocolates, you’ll be hooked. It’s a treat that’s not just sweet—it’s also a wonderful way to express your love and creativity!
Tips for Success
Now that you’re ready to make your own valentines day chocolates, here are some handy tips to ensure you achieve the best results. Trust me, these little nuggets of wisdom can make a world of difference!
Melting Chocolate Like a Pro
When it comes to melting chocolate, patience is key! Always use low heat to avoid burning it. If you’re using a microwave, go for short bursts of 20-30 seconds, stirring in between. And if you’re using a double boiler, make sure the water doesn’t touch the bottom of the bowl to prevent moisture from sneaking into your chocolate. Moisture can cause your chocolate to seize up, and we definitely don’t want that!
Choosing the Right Toppings
Feel free to get creative with your toppings! While I love a mix of nuts and dried fruits, you could also try crushed cookies, sprinkles, or even a dash of sea salt for that gourmet touch. Just remember to chop everything into small pieces so they fit nicely on top of your chocolates. Ensure they’re not too heavy or they might sink into the chocolate before it sets!
Avoiding Common Mistakes
Here are a couple of common pitfalls to watch out for:
- Skipping the chilling time: I know it’s tempting to dig in right away, but letting the chocolates chill for at least 2 hours is crucial for that perfect texture. Rushing this step can lead to a melty mess!
- Overmixing the chocolate: Once you’ve added your chocolate to the melted butter and cream, stir just until smooth. Overmixing can cause air bubbles to form, which isn’t what we want for these lovely chocolates.
- Not using quality chocolate: Remember, the better the chocolate, the better your homemade treats will taste. Splurge a little on high-quality chocolate; it’s worth it!
By following these tips, you’ll be well on your way to crafting the most delightful valentines day chocolates that are sure to impress! Happy chocolate making!
Serving Suggestions
Once you’ve whipped up your delightful valentines day chocolates, it’s time to think about how to present them! Trust me, a little extra thought in the presentation can make these treats feel even more special.
First off, consider serving your chocolates on a beautiful platter or in a decorative box. You could even wrap them in pretty cellophane tied with a ribbon for a charming gift presentation. It’s all about making that first impression count!
If you’re hosting a romantic dinner or a cozy gathering, why not pair your chocolates with some fresh strawberries? The juicy sweetness of strawberries complements the rich chocolate perfectly. You could even dip them in some leftover melted chocolate for a decadent treat!
Another fun idea is to serve your chocolates alongside a selection of cheeses—think creamy brie or sharp cheddar. The contrast of flavors will surprise your taste buds in the best way possible. Add some ers and a glass of red wine, and you’ve got a delightful cheese and chocolate board that’s perfect for sharing.
You can also get crafty with hot beverages. A warm cup of coffee, a rich hot chocolate, or even a glass of dessert wine can elevate your chocolate experience. Imagine sinking your teeth into a chocolate piece while sipping on a velvety cappuccino—heaven!
Don’t forget about presentation! Arrange your chocolates in a way that showcases their beautiful shapes and toppings. Use colorful liners in your molds or sprinkle some edible glitter on top for that festive touch. You could even label each type of chocolate if you’ve made different varieties—it’s a fun way to keep things organized and exciting!
Ultimately, the goal is to create a delightful experience for you and your loved ones. So, get creative with your serving ideas, and let your homemade valentines day chocolates shine!
Storage & Reheating Instructions
Now that you’ve made your scrumptious valentines day chocolates, it’s important to know how to store them properly so they stay fresh and delicious. Trust me, you’ll want to savor every last piece!
First things first, make sure the chocolates are completely set before storing them. This will help keep their beautiful shapes intact. Once they’re ready, you can store them in an airtight container at room temperature for up to a week. Just keep them in a cool, dry place away from direct sunlight to avoid melting.
If you want to keep them for a longer period, you can pop them in the refrigerator. They’ll last up to two weeks in there. Just be sure to separate layers with parchment paper to avoid them sticking together. And remember, refrigerating may slightly alter the texture, making them a bit firmer.
When it comes to reheating, you typically won’t need to heat these chocolates again, as they’re best enjoyed as is. However, if you find yourself with some leftover melted chocolate or want to repurpose them, just warm them gently using a microwave in short bursts (about 10-15 seconds) or on a double boiler. Stir frequently to ensure they melt evenly without burning.
And there you have it! With these simple storage and reheating tips, you can enjoy your homemade valentines day chocolates long after they’re made. Happy indulging!
Nutritional Information Section
As you indulge in these delightful valentines day chocolates, it’s good to know a bit about their nutritional content. Here’s a handy breakdown of the estimated values per piece, so you can enjoy them guilt-free!
- Calories: 120
- Fat: 9g
- Saturated Fat: 5g
- Unsaturated Fat: 3g
- Trans Fat: 0g
- Cholesterol: 5mg
- Sodium: 15mg
- Sugar: 10g
- Carbohydrates: 10g
- Fiber: 2g
- Protein: 2g
Keep in mind, these values are estimates and can vary based on the specific ingredients you choose. But don’t worry too much about the numbers—what matters most is the joy these valentines day chocolates bring to you and your loved ones! So go ahead, treat yourself!
FAQ Section
Got questions about making your own valentines day chocolates? No worries, I’ve got you covered! Here are some common queries along with my answers to help you create the best homemade chocolates ever!
Q: Can I use any type of chocolate for this recipe?
Absolutely! While I recommend a mix of dark and milk chocolate for that perfect balance of flavor, you can definitely use white chocolate or even flavored chocolate if that’s your preference. Just remember that melting times may vary, so keep an eye on it!
Q: How do I know when the chocolates are set?
You’ll want to chill your chocolates for at least 2 hours. They should feel firm to the touch and easily pop out of the molds. If they’re still soft, give them a bit more time in the fridge. Remember, patience pays off!
Q: Can I make these chocolates ahead of time?
For sure! These valentines day chocolates can be made a few days in advance. Just store them in an airtight container at room temperature or in the fridge to keep them fresh. They also make a great last-minute gift if you have them ready to go!
Q: What if I don’t have molds?
No problem at all! You can use a simple baking tray lined with parchment paper. Just pour the chocolate mixture onto the paper and spread it out evenly. Once it sets, you can cut it into squares or break it into pieces. It’s a fun and rustic way to enjoy your chocolates!
Q: Can I add flavors or extracts to the chocolate?
Definitely! Feel free to experiment with flavors. A splash of almond extract or a pinch of espresso powder can elevate your chocolates to a whole new level. Just make sure not to overdo it—start with a little and adjust to your taste!
Q: How should I store my chocolates?
Store your homemade valentines day chocolates in an airtight container. They can last for about a week at room temperature or up to two weeks in the fridge. Just remember to separate layers with parchment paper to keep them from sticking together!
Hopefully, these answers help clear up any questions you have about making your own delicious chocolates. Dive into the chocolate-making fun, and I can’t wait for you to share your creations!
Print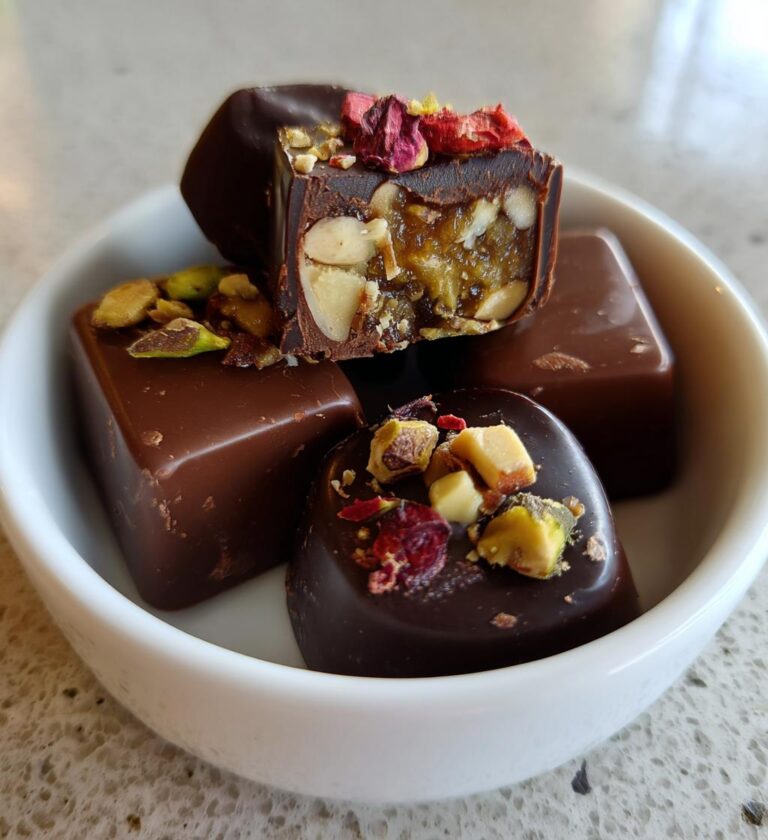
Valentines Day Chocolates to Melt Hearts and Create Joy
Delicious homemade chocolates for Valentine’s Day.
- Total Time: 2 hours 45 minutes
- Yield: 20 pieces 1x
Ingredients
- 200g dark chocolate
- 100g milk chocolate
- 50g butter
- 1/2 cup heavy cream
- 1 tsp vanilla extract
- 1/2 cup assorted nuts
- 1/2 cup dried fruits
Instructions
- Chop the dark and milk chocolate into small pieces.
- In a saucepan, melt the butter and heavy cream over low heat.
- Add the chopped chocolate and stir until smooth.
- Remove from heat and mix in vanilla extract.
- Pour the mixture into molds.
- Add nuts and dried fruits on top.
- Chill in the refrigerator for 2 hours.
- Remove from molds and serve.
Notes
- Use high-quality chocolate for best flavor.
- Customize with your favorite toppings.
- Store in a cool place.
- Prep Time: 30 minutes
- Cook Time: 15 minutes
- Category: Dessert
- Method: No-bake
- Cuisine: American
- Diet: Vegetarian
Nutrition
- Serving Size: 1 piece
- Calories: 120
- Sugar: 10g
- Sodium: 15mg
- Fat: 9g
- Saturated Fat: 5g
- Unsaturated Fat: 3g
- Trans Fat: 0g
- Carbohydrates: 10g
- Fiber: 2g
- Protein: 2g
- Cholesterol: 5mg
Keywords: valentines day chocolates, homemade chocolates, chocolate recipe